As of now, CarlsenBot v1 is completed. It just went through the final presentation with flying colors, I’m happy to report. This post will detail the project, my findings, possible future plans, etc…
Here is this post in video form:
About

It’s a gargantuan thing
CarlsenBot is my team’s final project for ECE4180 Embedded Systems at Georgia Tech.
CarlsenBot was built by me and my teammates: Anthony Trakowski, Daniel Paul Martin, and James Flohr. Since I had the idea for the project, I assumed the managerial role. CarlsenBot is a voice activated chess playing robot. It’s exactly what it sounds like: user (or users) can say the chess move they want to make, and the robot realizes them (the idea is to emulate “Wizard’s Chess“, from Harry Potter lore). For a sample, check out the video below:
Overview
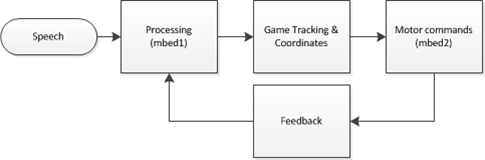 A highly simplified project flow diagram is above. **There is a slight typo: “mbed1” and “mbed2” should just be “mbed”. Mbed (www.mbed.org) is the microcontroller platform we are using. It has a lot of support, and is the microcontroller used for the majority of this class.
The major components are: a speech processing unit for recognizing commands, a game tracking unit that does everything related to the actual chess game, and a robot control unit, that controls all the hardware. These are discussed in detail next.
Voice Recognition
As mentioned above, the idea was to emulate Wizard’s Chess. Users would use the usual chess jargon, i.e. “Knight to e4”, to indicate a move. The problem would occur when that choice leads to an ambiguity, if say, two knights could both move to e4. Because of this, we indicate moves by indicating both a start AND destination square, e.g. “f3 to e4”. This would lead to yet another problem, where two letters could potentially sound the same, such as “b” and “d”, making speech recognition difficult. This was circumvented by using the Navy phonetic alphabet (‘a’ = “alpha”, ‘b’ = “bravo”, etc…). Future revisions may include work to make this sound more natural, and more alike to the standard chess move notation. For now, moves are recognized by saying a letter, number, letter, and number in succession, with the assumption the first number-letter pair are the source square, and the latter half the destination square. With the standards set, we set upon finding a suitable voice recognition platform. We ultimately found a hardware solution in EasyVR (below).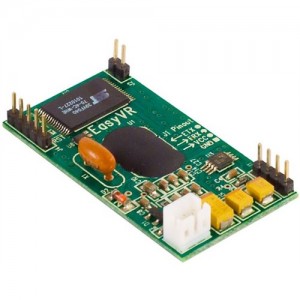
Microphone not shown
EasyVR can be programmed to recognize both trained and untrained words, though obviously to a limited capacity, but it should be enough for four users. Prior to usage, each user needs to have trained the first 8 phonetic alphabet letters. For reference, they are:
Alpha
Bravo
Charlie
Delta
Echo
Foxtrot
Golf
Hotel
These reference columns on the chess board. EasyVR comes preprogrammed with SPEAKER INDEPENDENT recognition for the numbers 0-9. Only 1-8 is used for referencing chessboard rows.
**EasyVR is very sensitive to noise. It’s important that if the reader intends to replicate this project and continue using EasyVR, to be in a suitable (read: quiet) working environment.
Once all four parameters are recognized, it is passed serially to a desktop containing the next unit of our project…
Chess Game
A desktop nearby is running a chess engine called “chess-at-nite” (thanks to the creators). The engine does all the functions related to the game itself, such as keeping track of turns, detecting checks/mates, and most importantly, validating moves. We had to modify it to accept serial data coming from the mbed (well, James did). The serial data is just a four-character (letter-number-letter-number) string with the intended move. If it is indeed valid, it gives the OK for the robot to make the necessary hardware movements. It does this by passing back the string to the mbed. If the move is not valid, the recognized parameters are nulled, and the current turn begins anew. Here’s an example of the program output:

(Little does it know I’m setting a trap for it…)
* Thanks to James and Tony for going above and beyond what I had in mind. It was my intention to write our own validation function. Moreover, I had only intended for this to be player vs. player, but this engine allows a player to play against a computer. It’s easily in my opinion the coolest part of this project: to play against a computer in a physical sense.
** The link above is the original, bare engine, and does not contain our modifications. Please email me, Ben Yeh at ben.p.yeh@gmail.com for our changes. I will also put it up on my github in due time.
Movement
Here is my contribution: Paul (Daniel) and I built this “robot”, having no prior mechanical engineering experience. Go us.
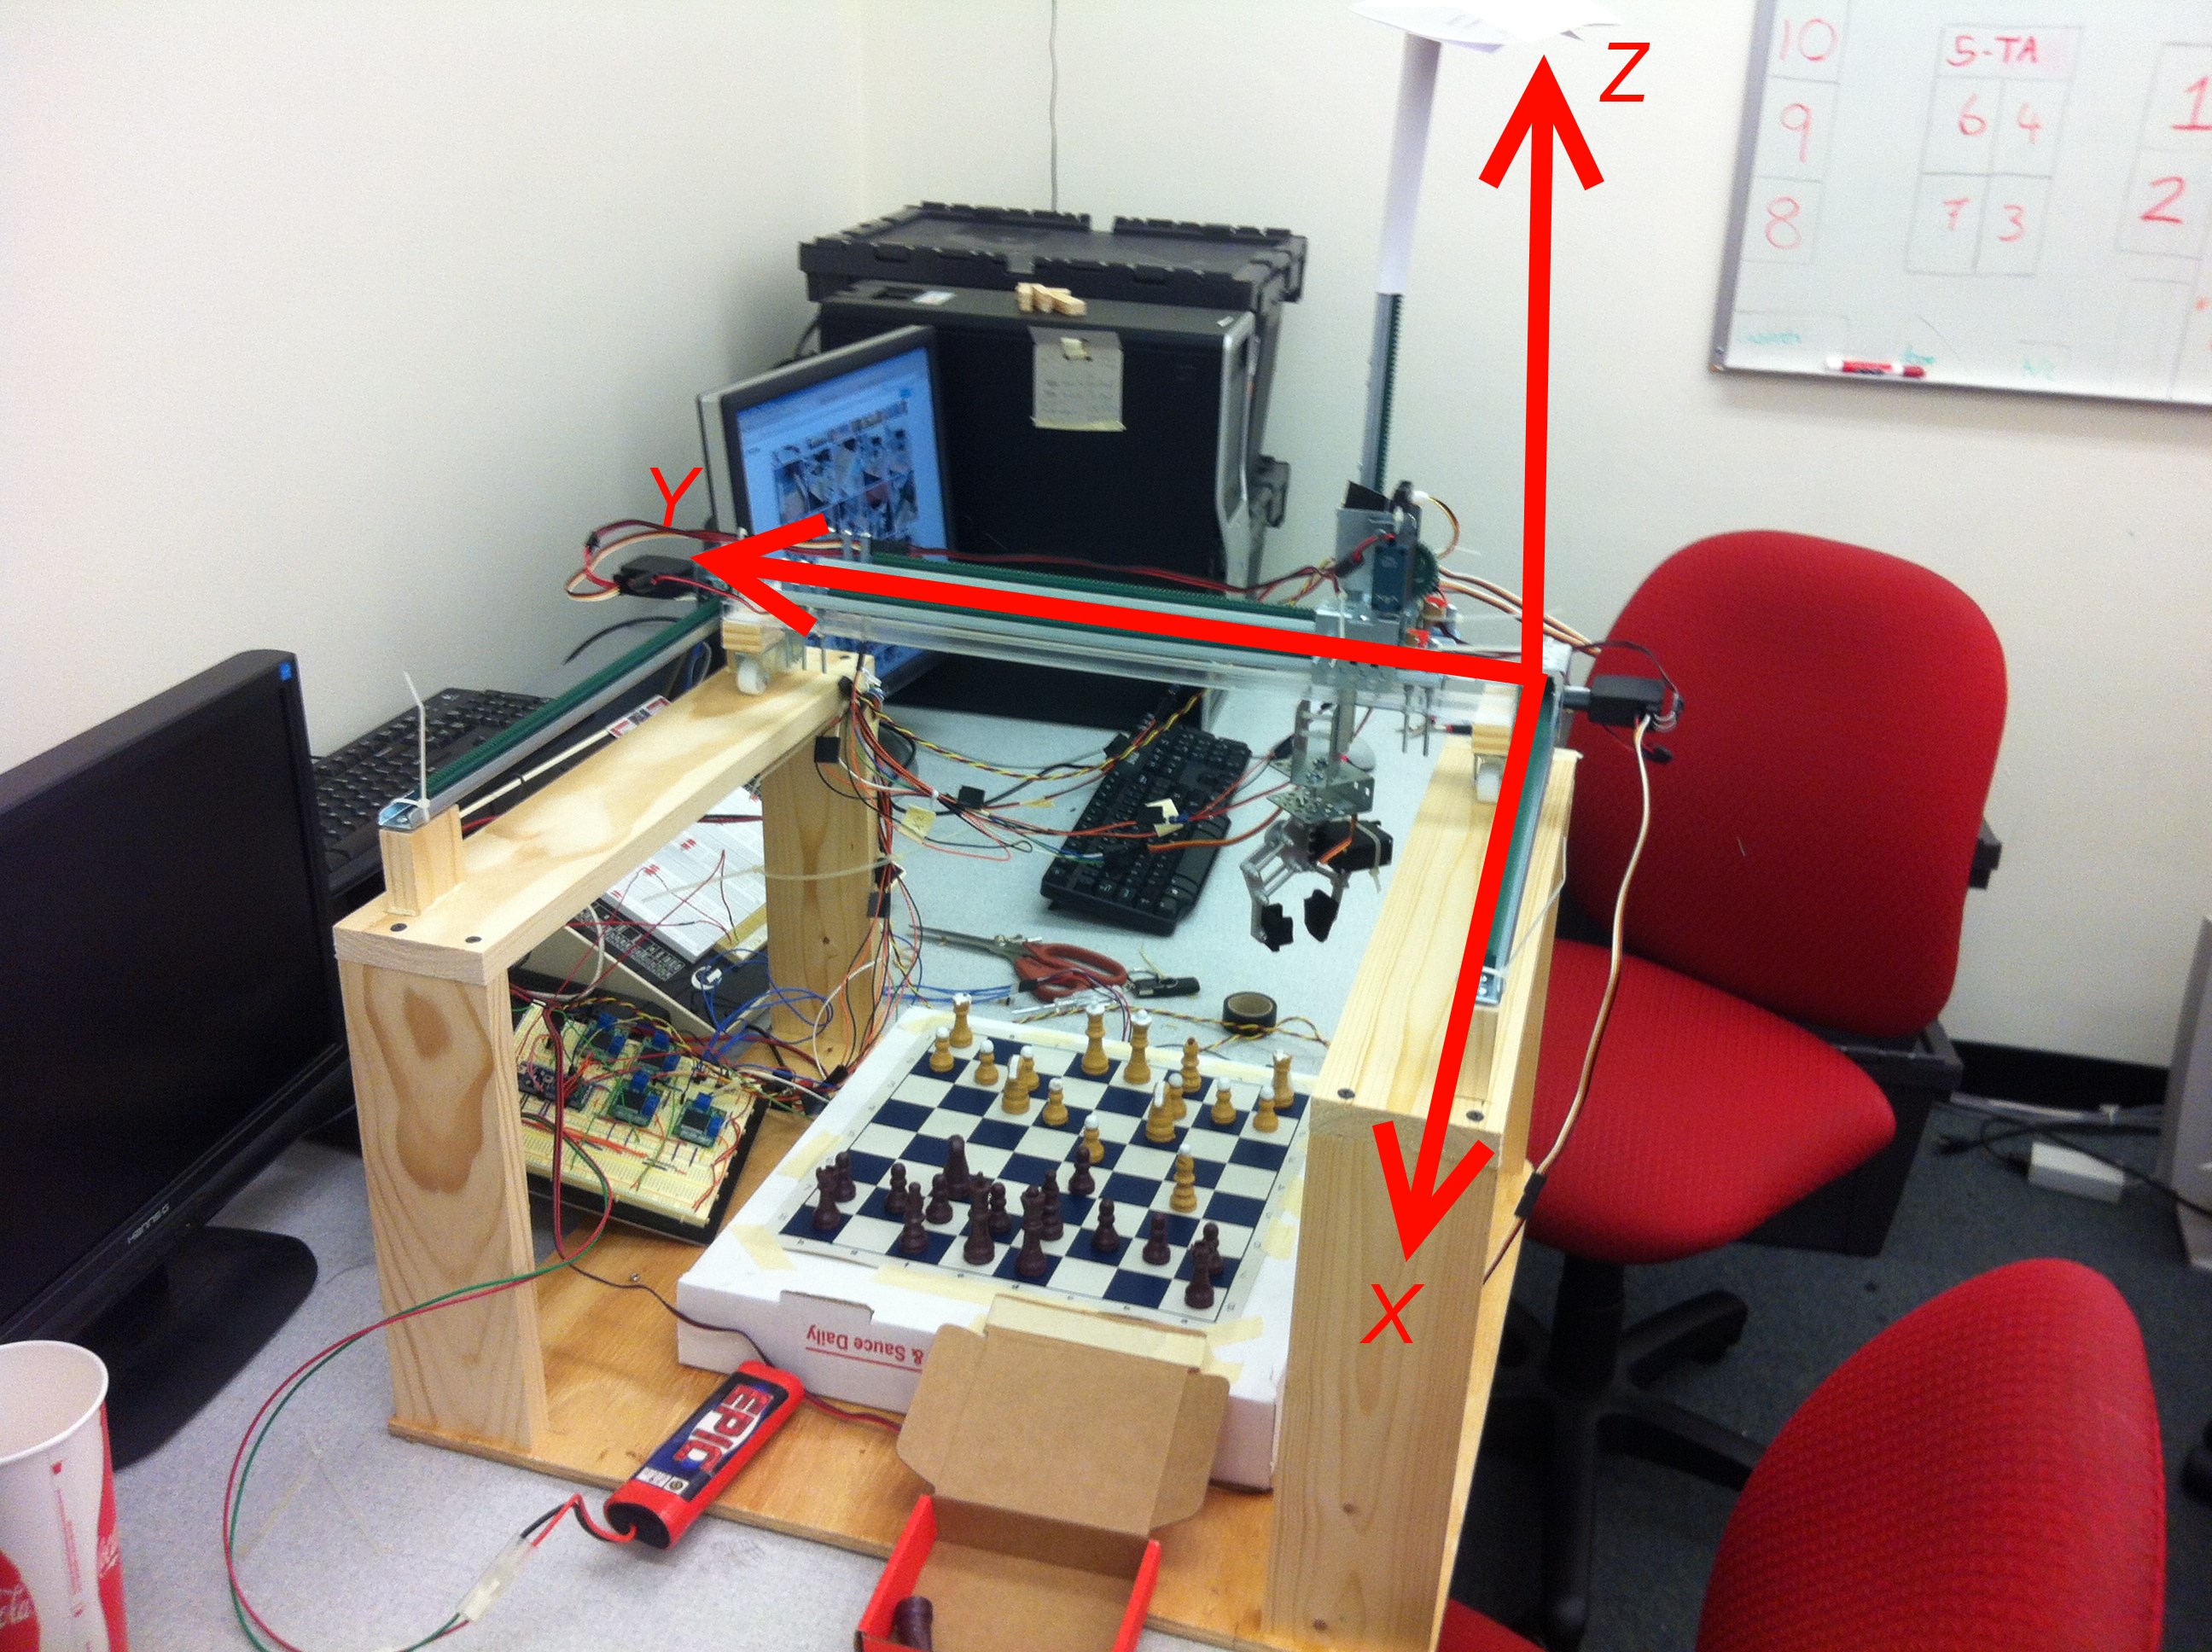
Look in the picture above for the standard axis orientations. For the sheer span, two motors are needed to realize movement in the x axis. Here are the motors and a close up picture of how they move:
 When the X motors turn, the gear translates the rotational movement into linear movement (the technical term for the setup is a pinion (the gear) and rack (toothed rails)). When they move, they carry the platform in between them along the x axis. Resting on the Y axis is a similar setup to the X axis, just in a smaller scale. Because of this, it only requires one motor.

Here’s a closeup of the platform in between X motors, on which this travels:

Wire management leaves something to be desired
Lastly, sandwiched between the double rails is the section for the Z motor to rest on:
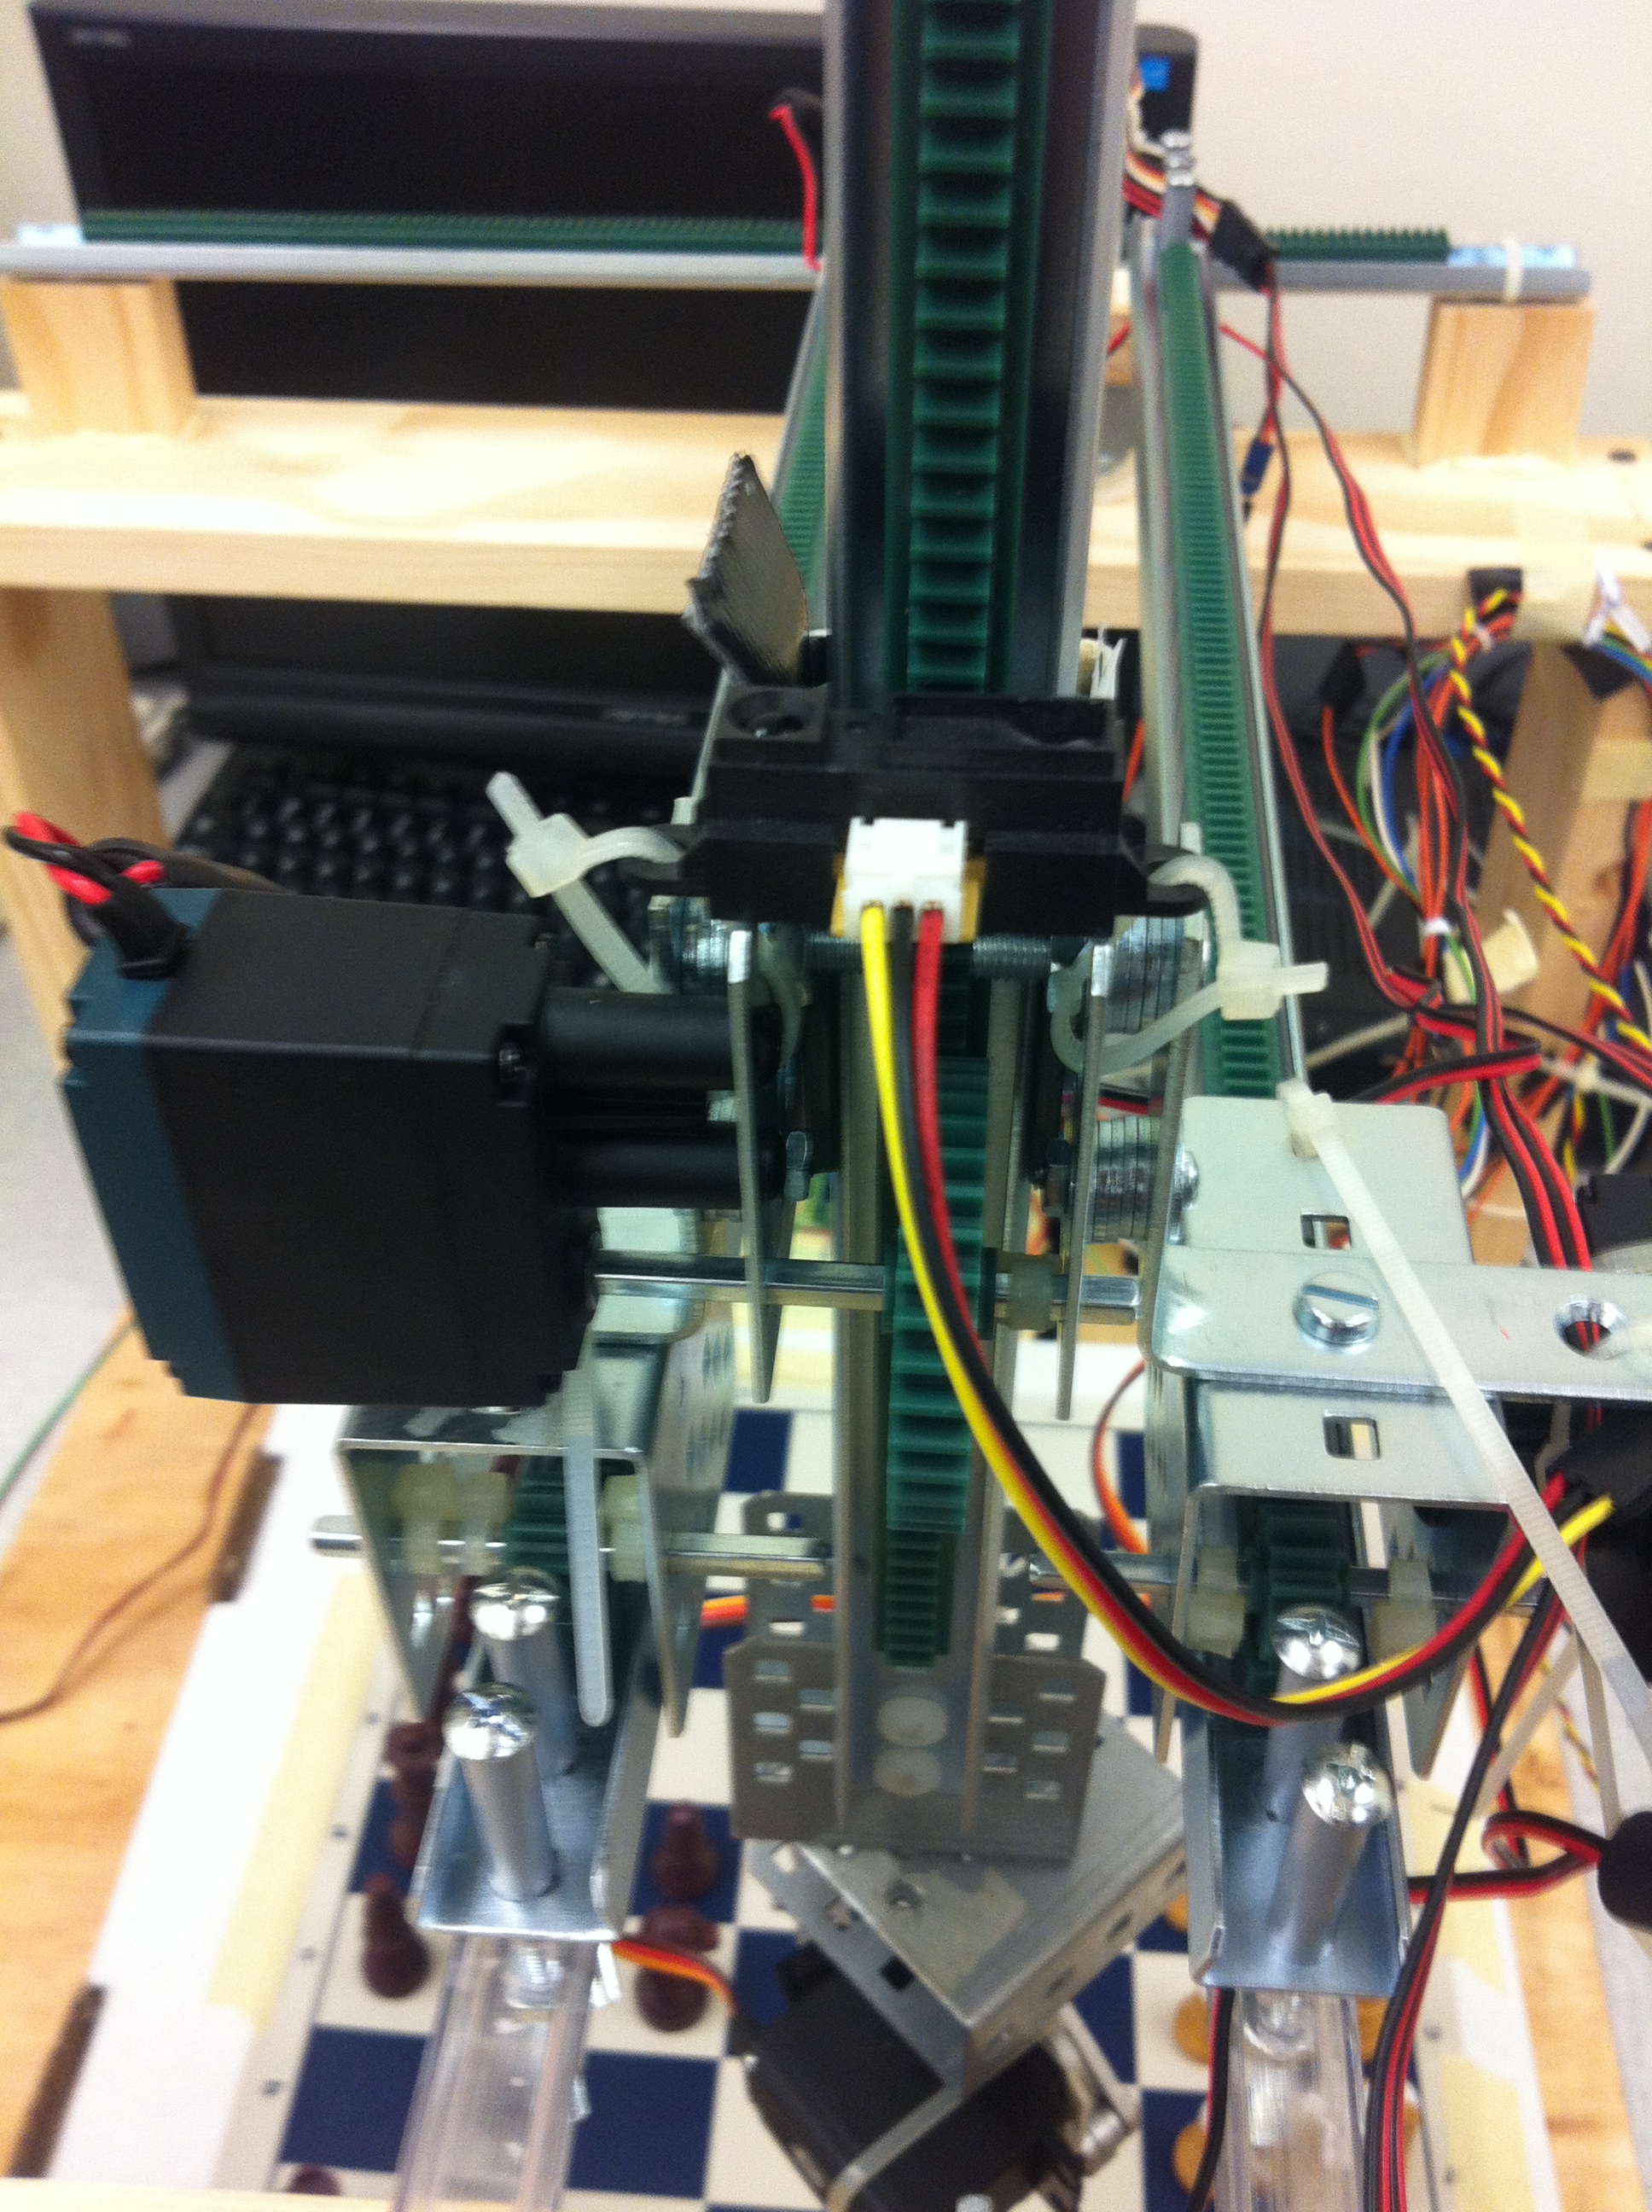
In this picture, the double rails are the Y axis, and the motor on the left controls the z axis. Unlike the X and Y axis, which moves with respect to a fixed rack, the Z axis motor is fixed, and moves the arm up and down.
 This picture deserves some explanation. Our rig uses simple DC motors from Vex to turn the gears. Vex also produces these encoders as separate I2C devices that attach to the back of the motors. The encoders are quadrature encoders that will allow us to poll them to determine the current position. All motors are identical (with the exception of the Y axis motor, which is just slightly more powerful), so they can all be affixed with the same encoder. It was an oversight on my part to not buy enough. With more time, we would have waited until we bought another, but we received all the parts with about a week and half to finish the project. Instead, we opted for using a distance sensor, shown above. The distance sensor is fixed on the Z axis bracket, and senses the distance between it and this variable barrier:
![]() MacGyver would be proud. (That’s Paul in the picture)
MacGyver would be proud. (That’s Paul in the picture)
On the other end of the Z axis arm is the claw:
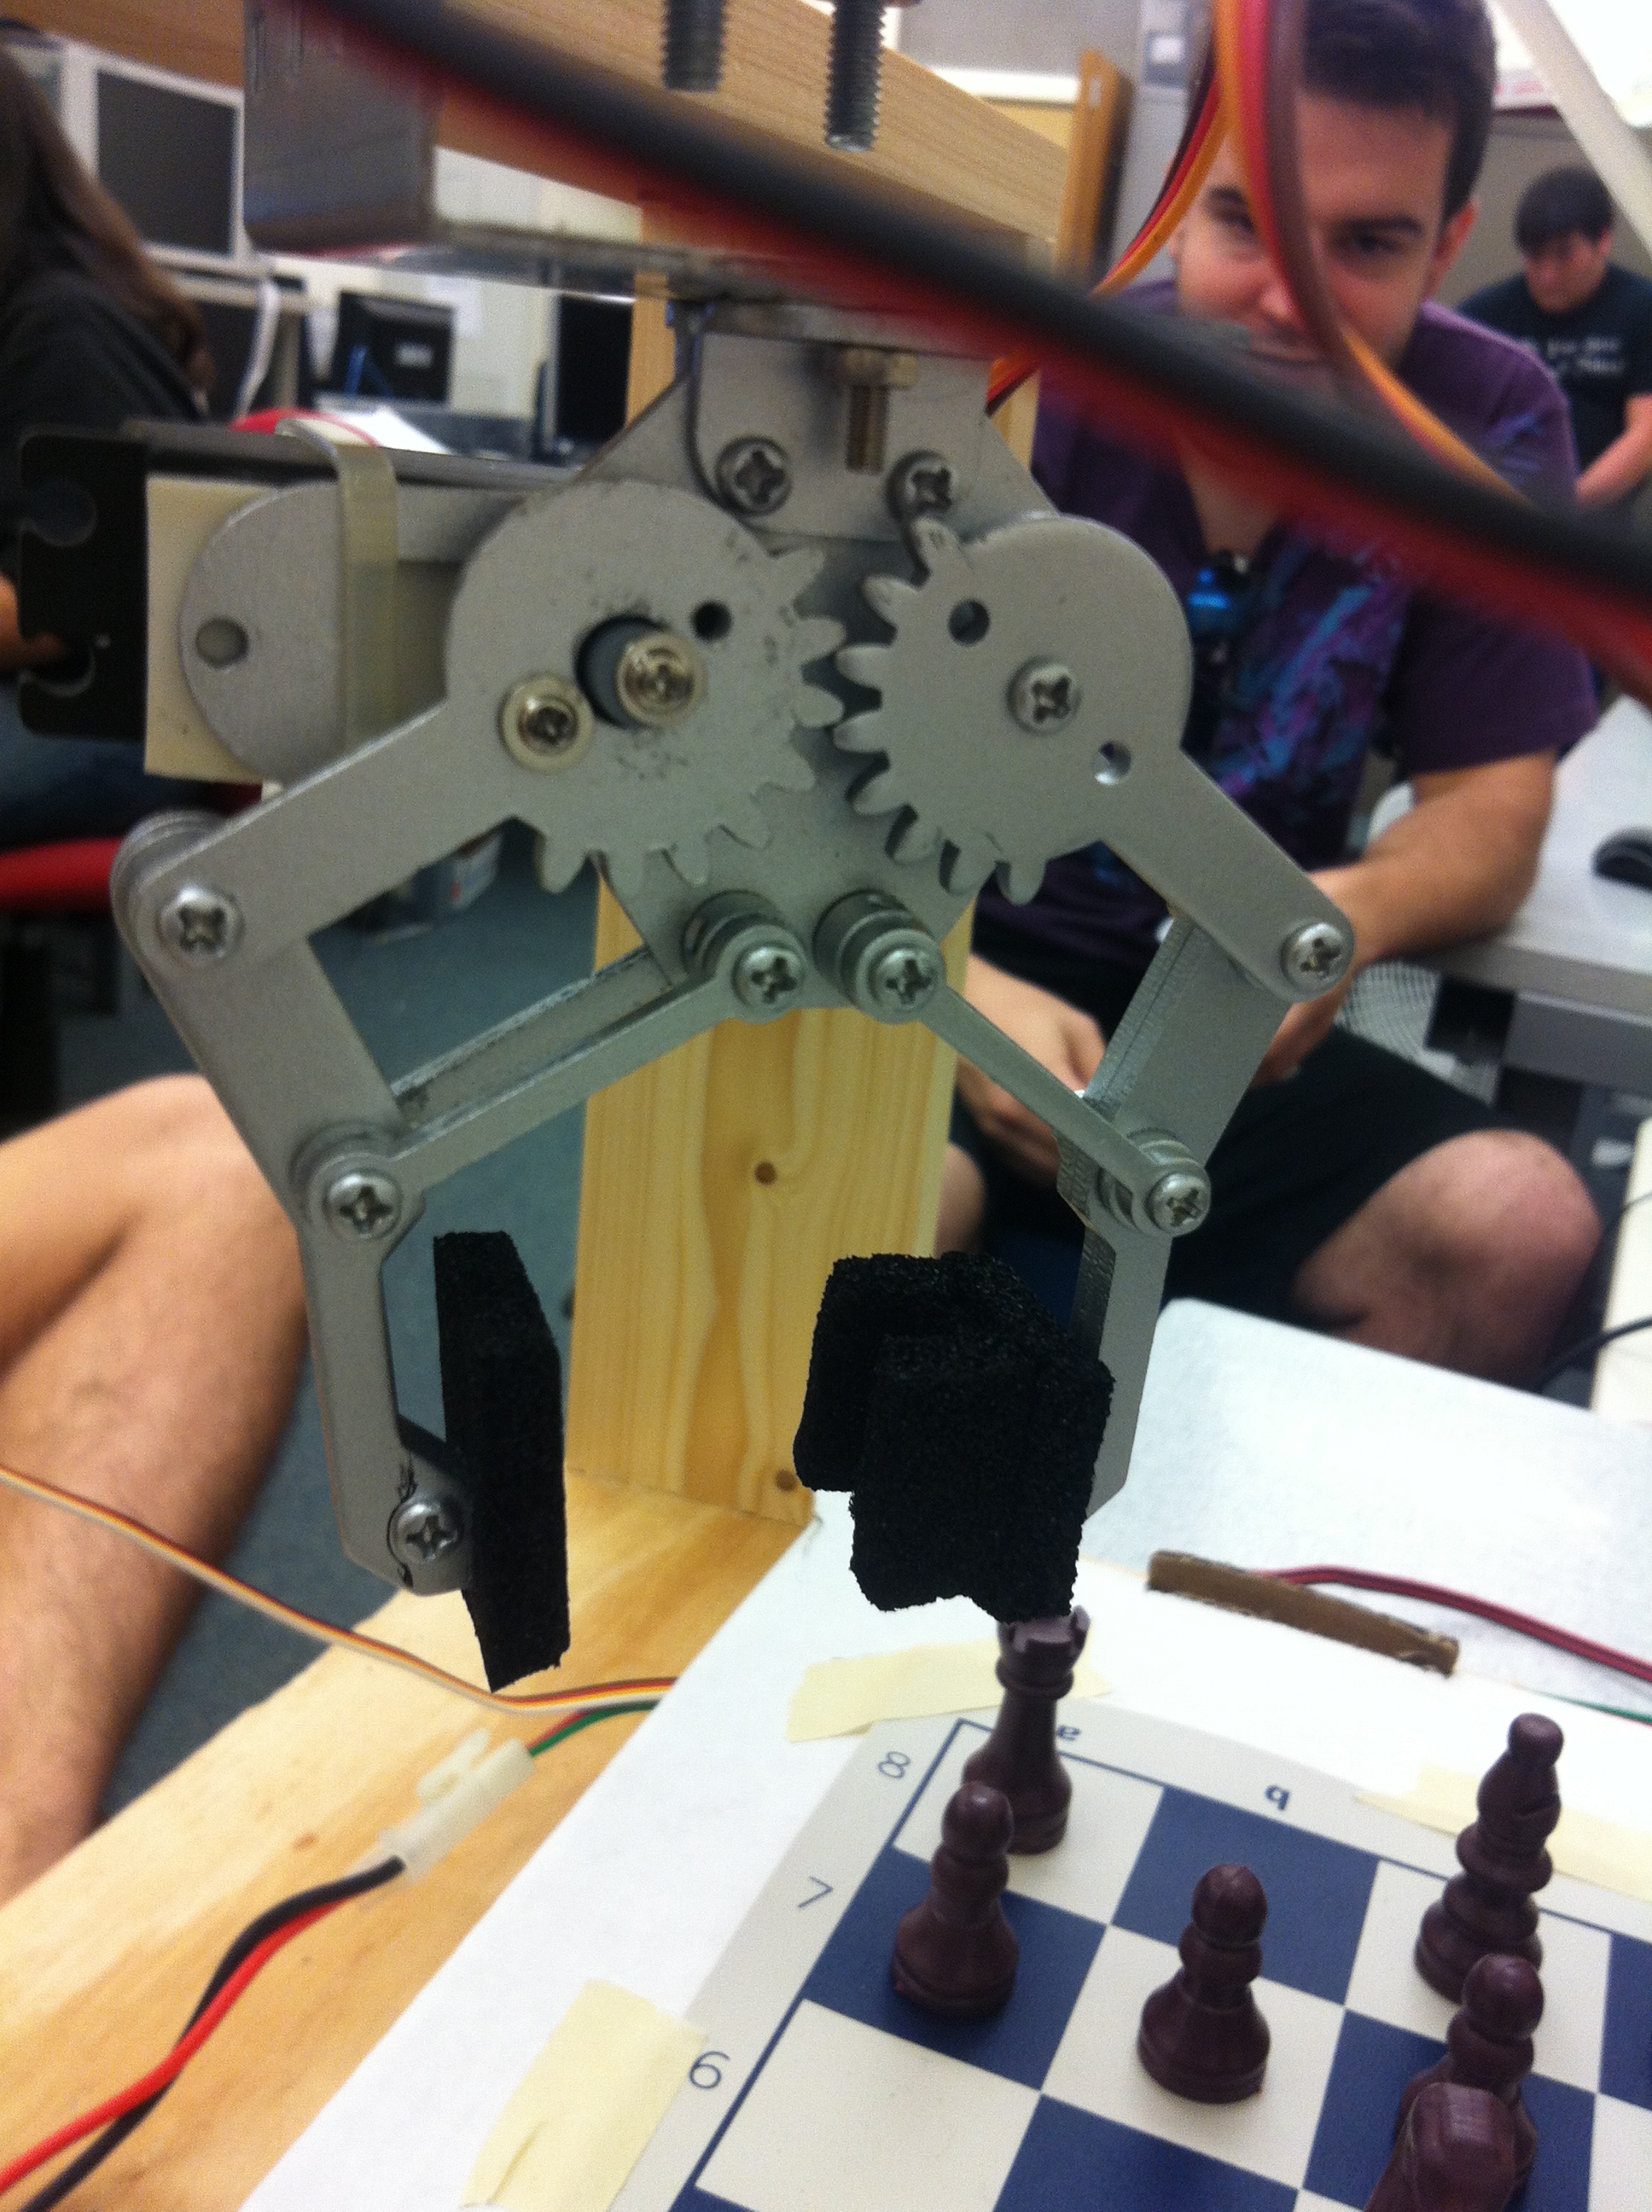
We glued some foam pieces onto the end, so as to allow us to grab pieces more easily. The claw is controlled by a servo motor, with only two set positions in code: OPEN and CLOSE. When X, Y, and Z are done moving, the claw is then free to grip or release a piece.
As mentioned, the encoders on the motor is important, since it provides feedback. PID loops control all the motors (well, actually just PI in the case). I couldn’t quite tune it to get what I wanted to happen, so a fix is that the motors just get “close enough”, and then moves with the minimum speed to its destination. You may see this in some of the videos: the rig moves with variable speed towards its destination, stops, and crawls for some small amount. This has successfully fixed overshoots without too much delay.
When the current move is done, the engine updates the game, and CarlsenBot waits for the next move.
To get the mbed code, please follow this link and scroll to the bottom: https://mbed.org/users/pyeh9/notebook/carlsenbot/
Hope you’ve enjoyed reading. Please email me at ben.p.yeh@gmail.com if you have any questions.
Here are some more videos:
https://www.youtube.com/watch?v=M3mgB6fCdAE (This video shows what happens in a checkmate. It’s not as dramatic as I’d like it to be. If you pause at the end where show the terminal results, a line that says “…mate!” is printed at the top.
https://www.youtube.com/watch?v=_U4eNOq6PhU (This was our first successful capture)
Future works:
- There’s no way to tell it to castle. Because of this, it’s not likely we can play a full game with the computer. This shouldn’t be hard though.
- It’s VERY loud, but that’s more than likely the mechanical design. There are grinding between metal parts.
- Once in a blue moon it will drop a piece. A better engineered claw should fix that.
- It’s slightly unstable, but again, that’s more on the mechanical side.
- Cleaner look
- As mentioned, try to implement the usual chess jargon
Thanks for reading. If you have questions, don’t hesitate to comment or send me an email at ben.p.yeh@gmail.com

Pingback: Voice controlled chess robot
Pingback: rndm(mod) » Voice controlled chess robot
Pingback: Voice controlled chess robot | Froppa.com
Pingback: Voice controlled chess robot - RaspberryPiBoards
Pingback: Voice controlled chess robot | Blog of MPRosa
Pingback: Voice controlled chess robot | Daily IT News on IT BlogIT Blog
Pingback: Voice controlled chess robot | Make, Electronics projects, electronic Circuits, DIY projects, Microcontroller Projects - makeelectronic.com
Pingback: IT青年舍 » Voice controlled chess robot