In this post I will detail what my group (Cameron Reid, Carlton Beatty, Chris Stubel, and myself, Ben Yeh) have been on since September. Allow me to present, my senior design:
Robotic Arm with Kinect Interface
*https://github.com/pyeh9/Kinect-Controlled-Arm (Github repo of code)
To put it simply, it’s a robot arm that copies you. Think motion capture, but the results you see in real time on hardware.

Isn’t she a ‘beaut? Now if I had just said “robotic arm”, I’d think the the typical reaction would be, “ppfftt, what’s so special about that?” Two things makes this stand out.

The first is the end affector. We did away with the standard open and close claw, and attempted to fashion something that looks and moves like the human hand. Admittedly, functionality wise, it’s not so different from the claw in that the hand simply opens and closes, but it’s a step towards a dextrous hand in the future.
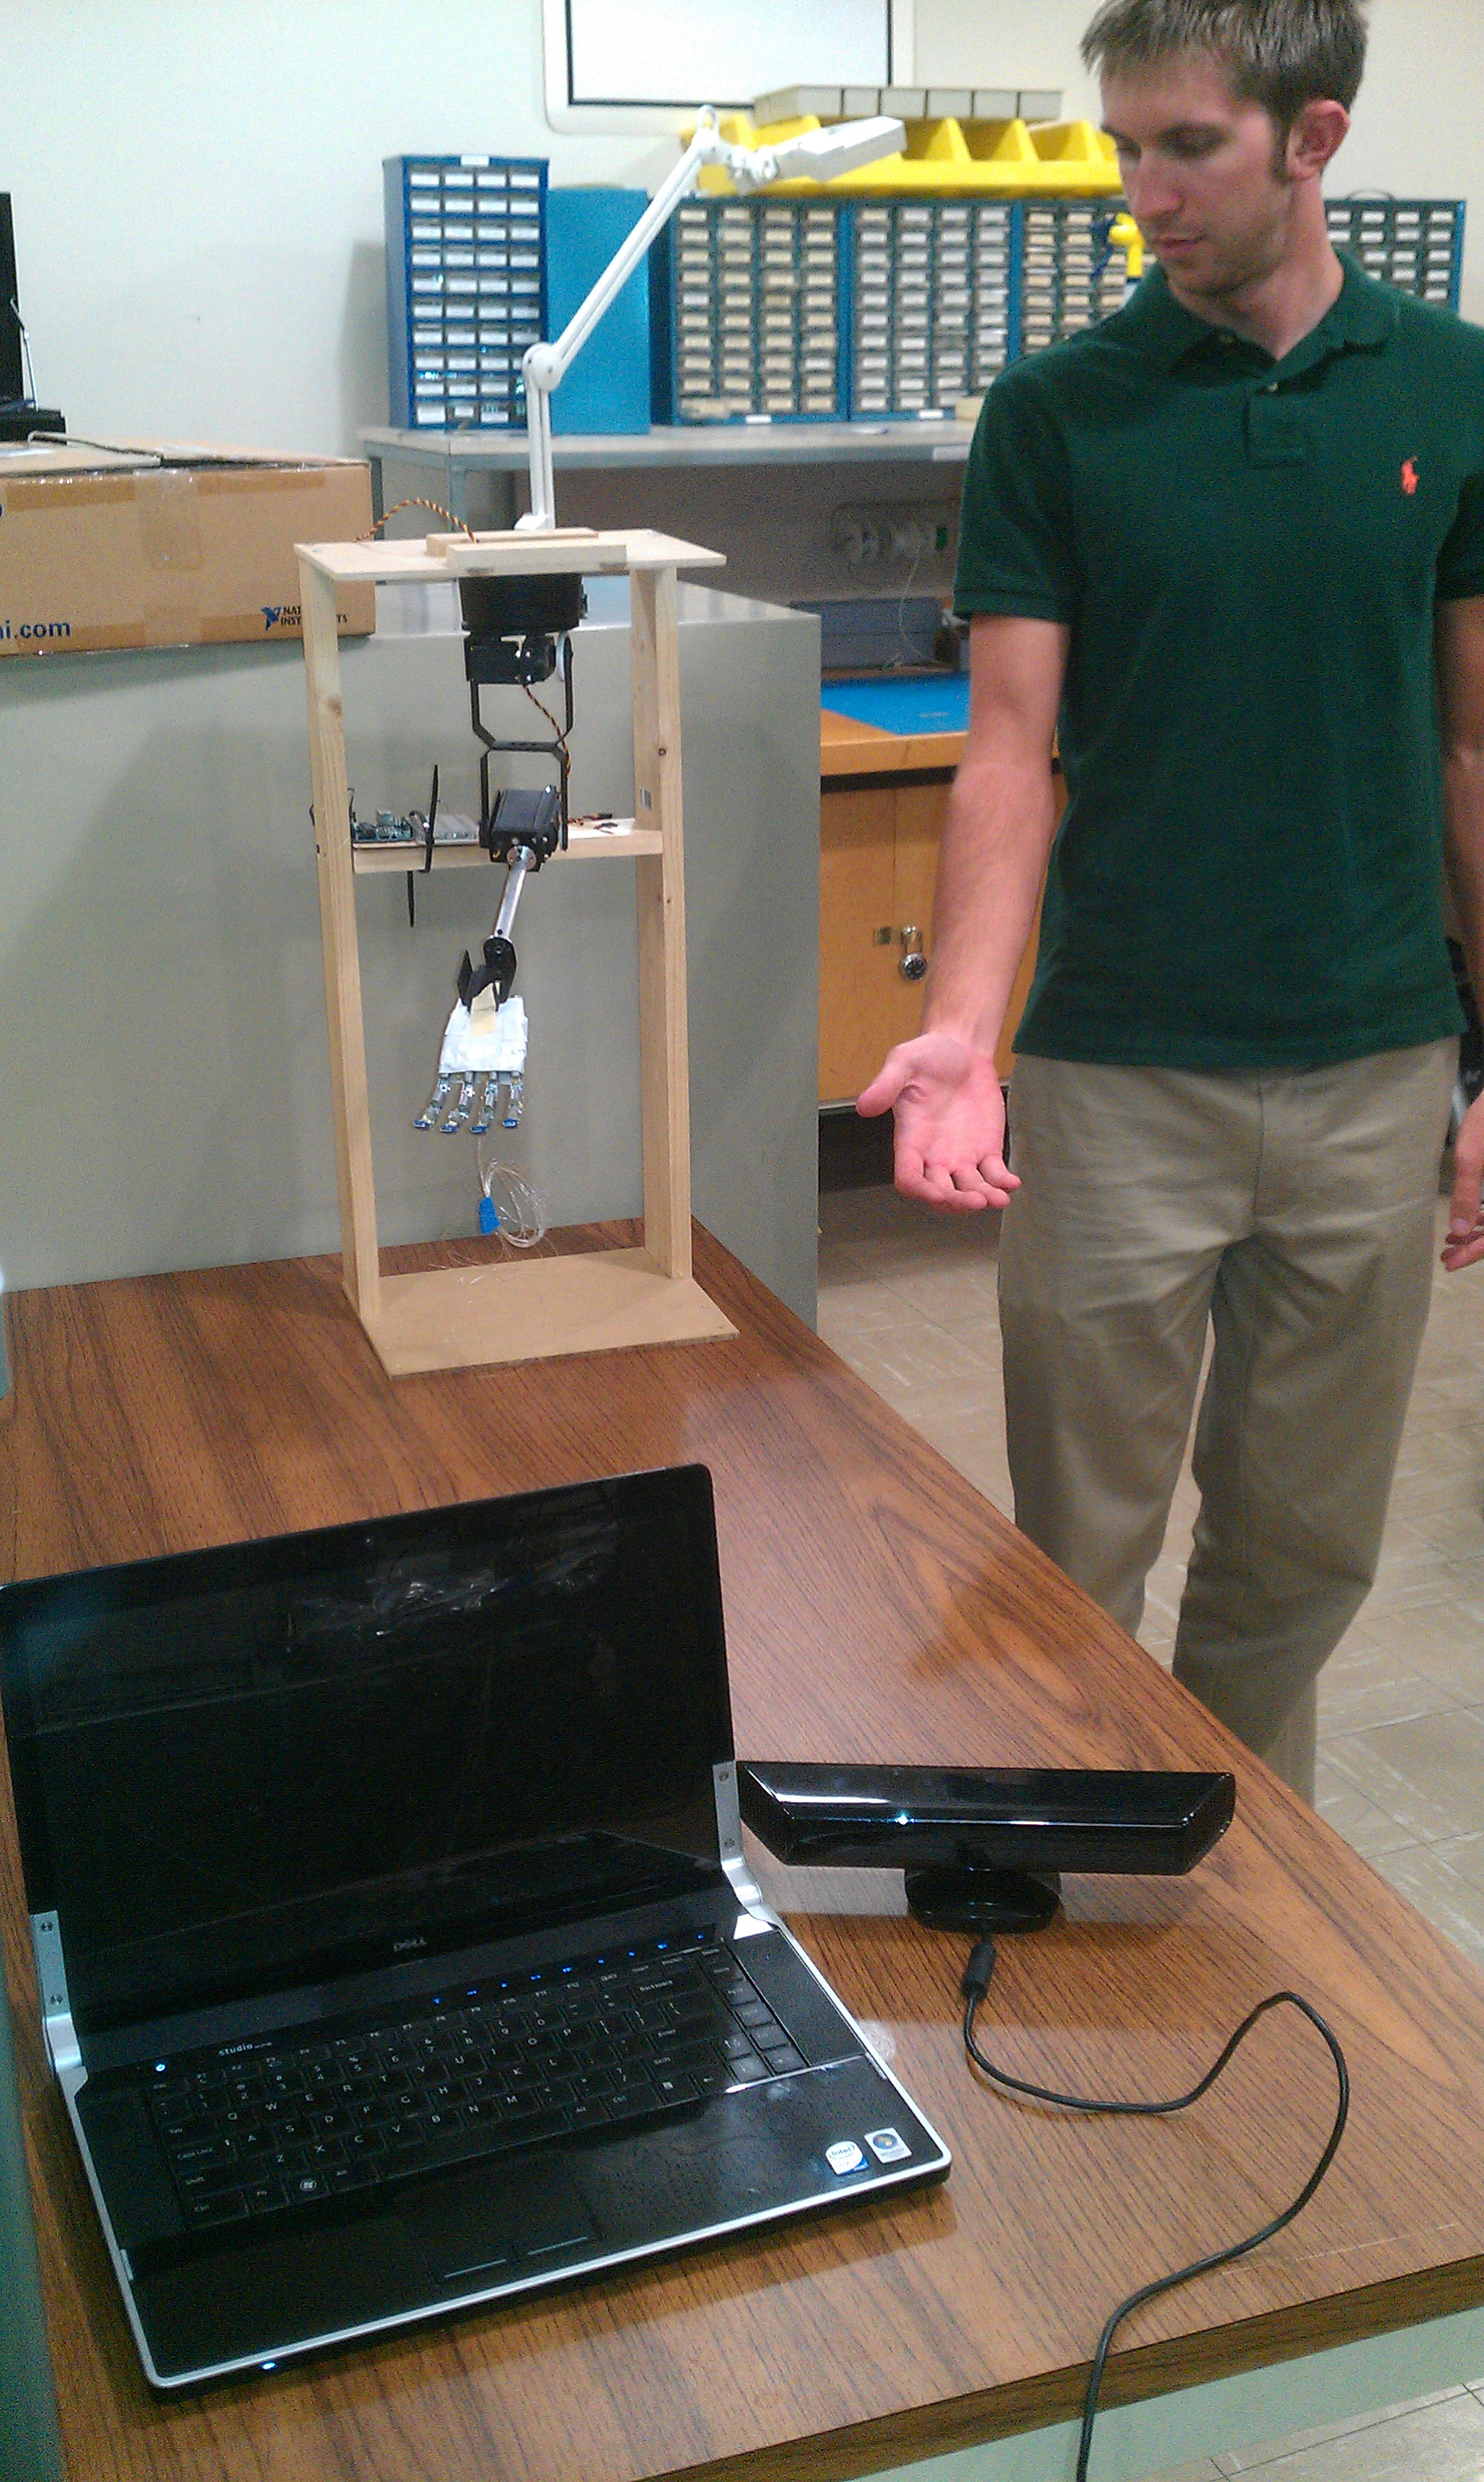

Second is how it’s controlled: via the Kinect and a custom sensor-glove. With this, the arm copies YOU in (almost) real time. Let me show you this thing in action:
and another:
As advertised, observe the arm is roughly going through the exact same motion as me.
Application
I did not build this thing in mind with any one specific application. What I wanted was an intuitive interface for controlling a robot. This robot could then be sent out into situations that humans can’t or shouldn’t go. Imagine, if I could put some wheels on this bad boy to make it mobile, and I had another one for the other arm, this thing might be able to administer disaster relief, bomb disposal, become a field medic, collecting samples in deep sea diving, firefighting, etc..
It’s also my first foray into the field of robotics, however cursory it was. I did not focus my coursework on robotics or controls at all. In addition, just about everything was built (read: hacked) from scratch.
If nothing else, I had a lot of fun building this thing, and I think it’s really freaking cool. Here’s a video of the group messing around:
HOW IT WORKS
At the highest level the system consists of: a Kinect, a PC, a microcontroller, and the rig (arm). Here’s a component diagram:
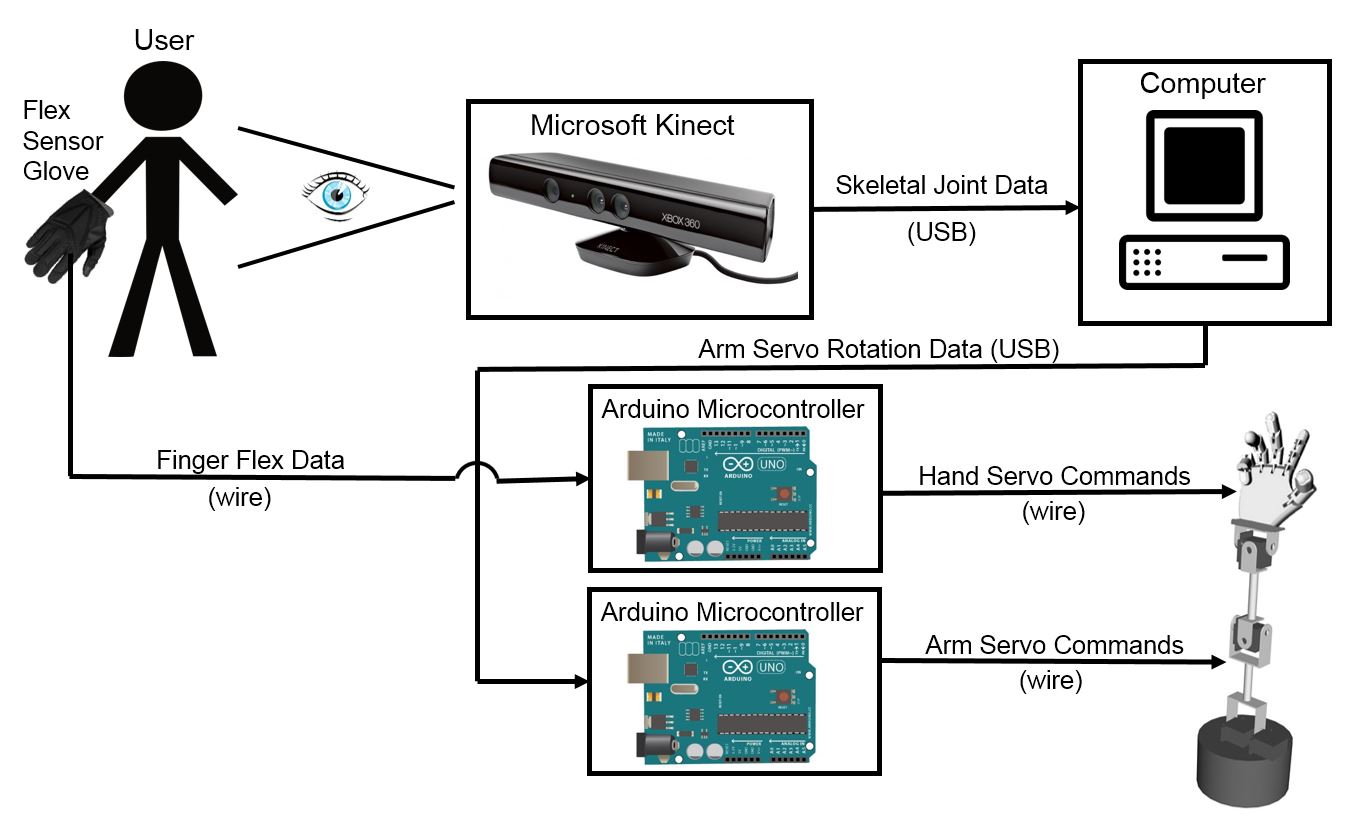 A user stands in front of the Kinect which does some black magic to track the user’s arm’s position (just the arm though, up to the wrist). This is in conjunction with the glove with tracks the user’s hands. The glove hardware is simple enough to be processed by one uC (an Arduino UNO in this case), but the Kinect’s sensor information is processed by a program (written in visual C++), then sent to another microcontroller (also an Arduino). The Arduinos then actuate the motors according the to data that was received.
Let’s go into more detail about how it works. This will be broken down into hardware (construction of the hand, arm, and glove) and software (using the Kinect, uC programming), and some misc.
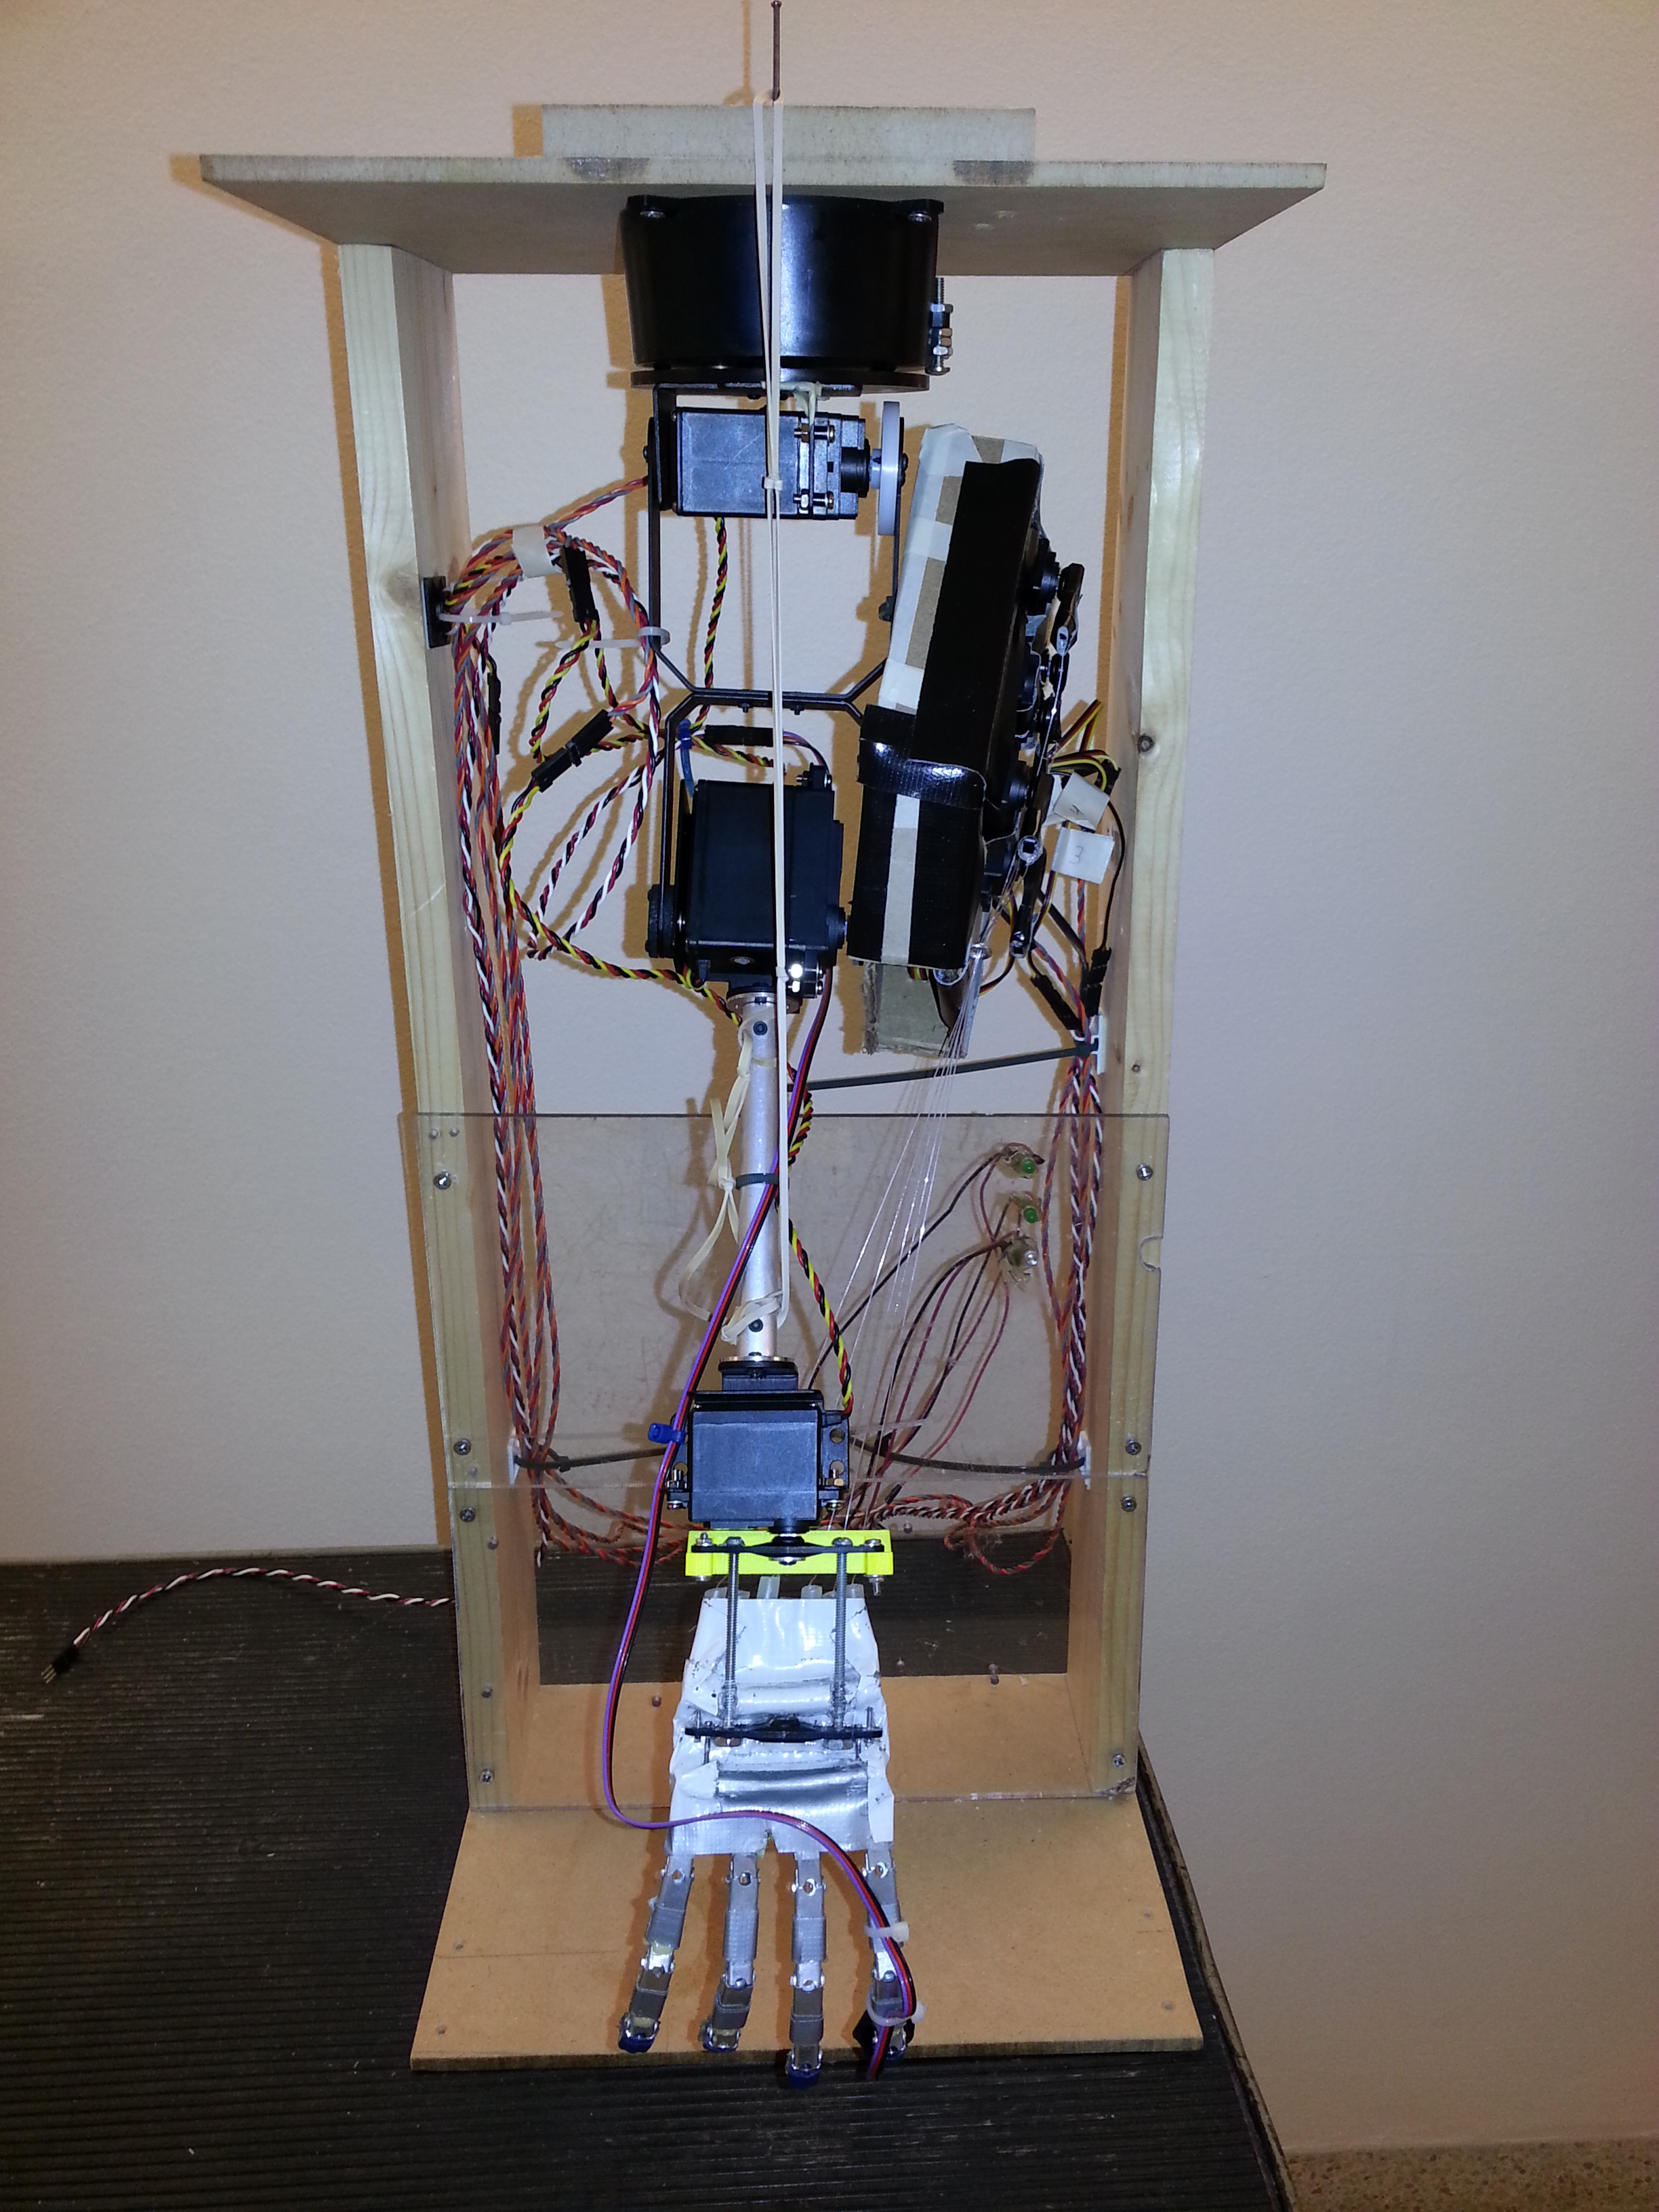
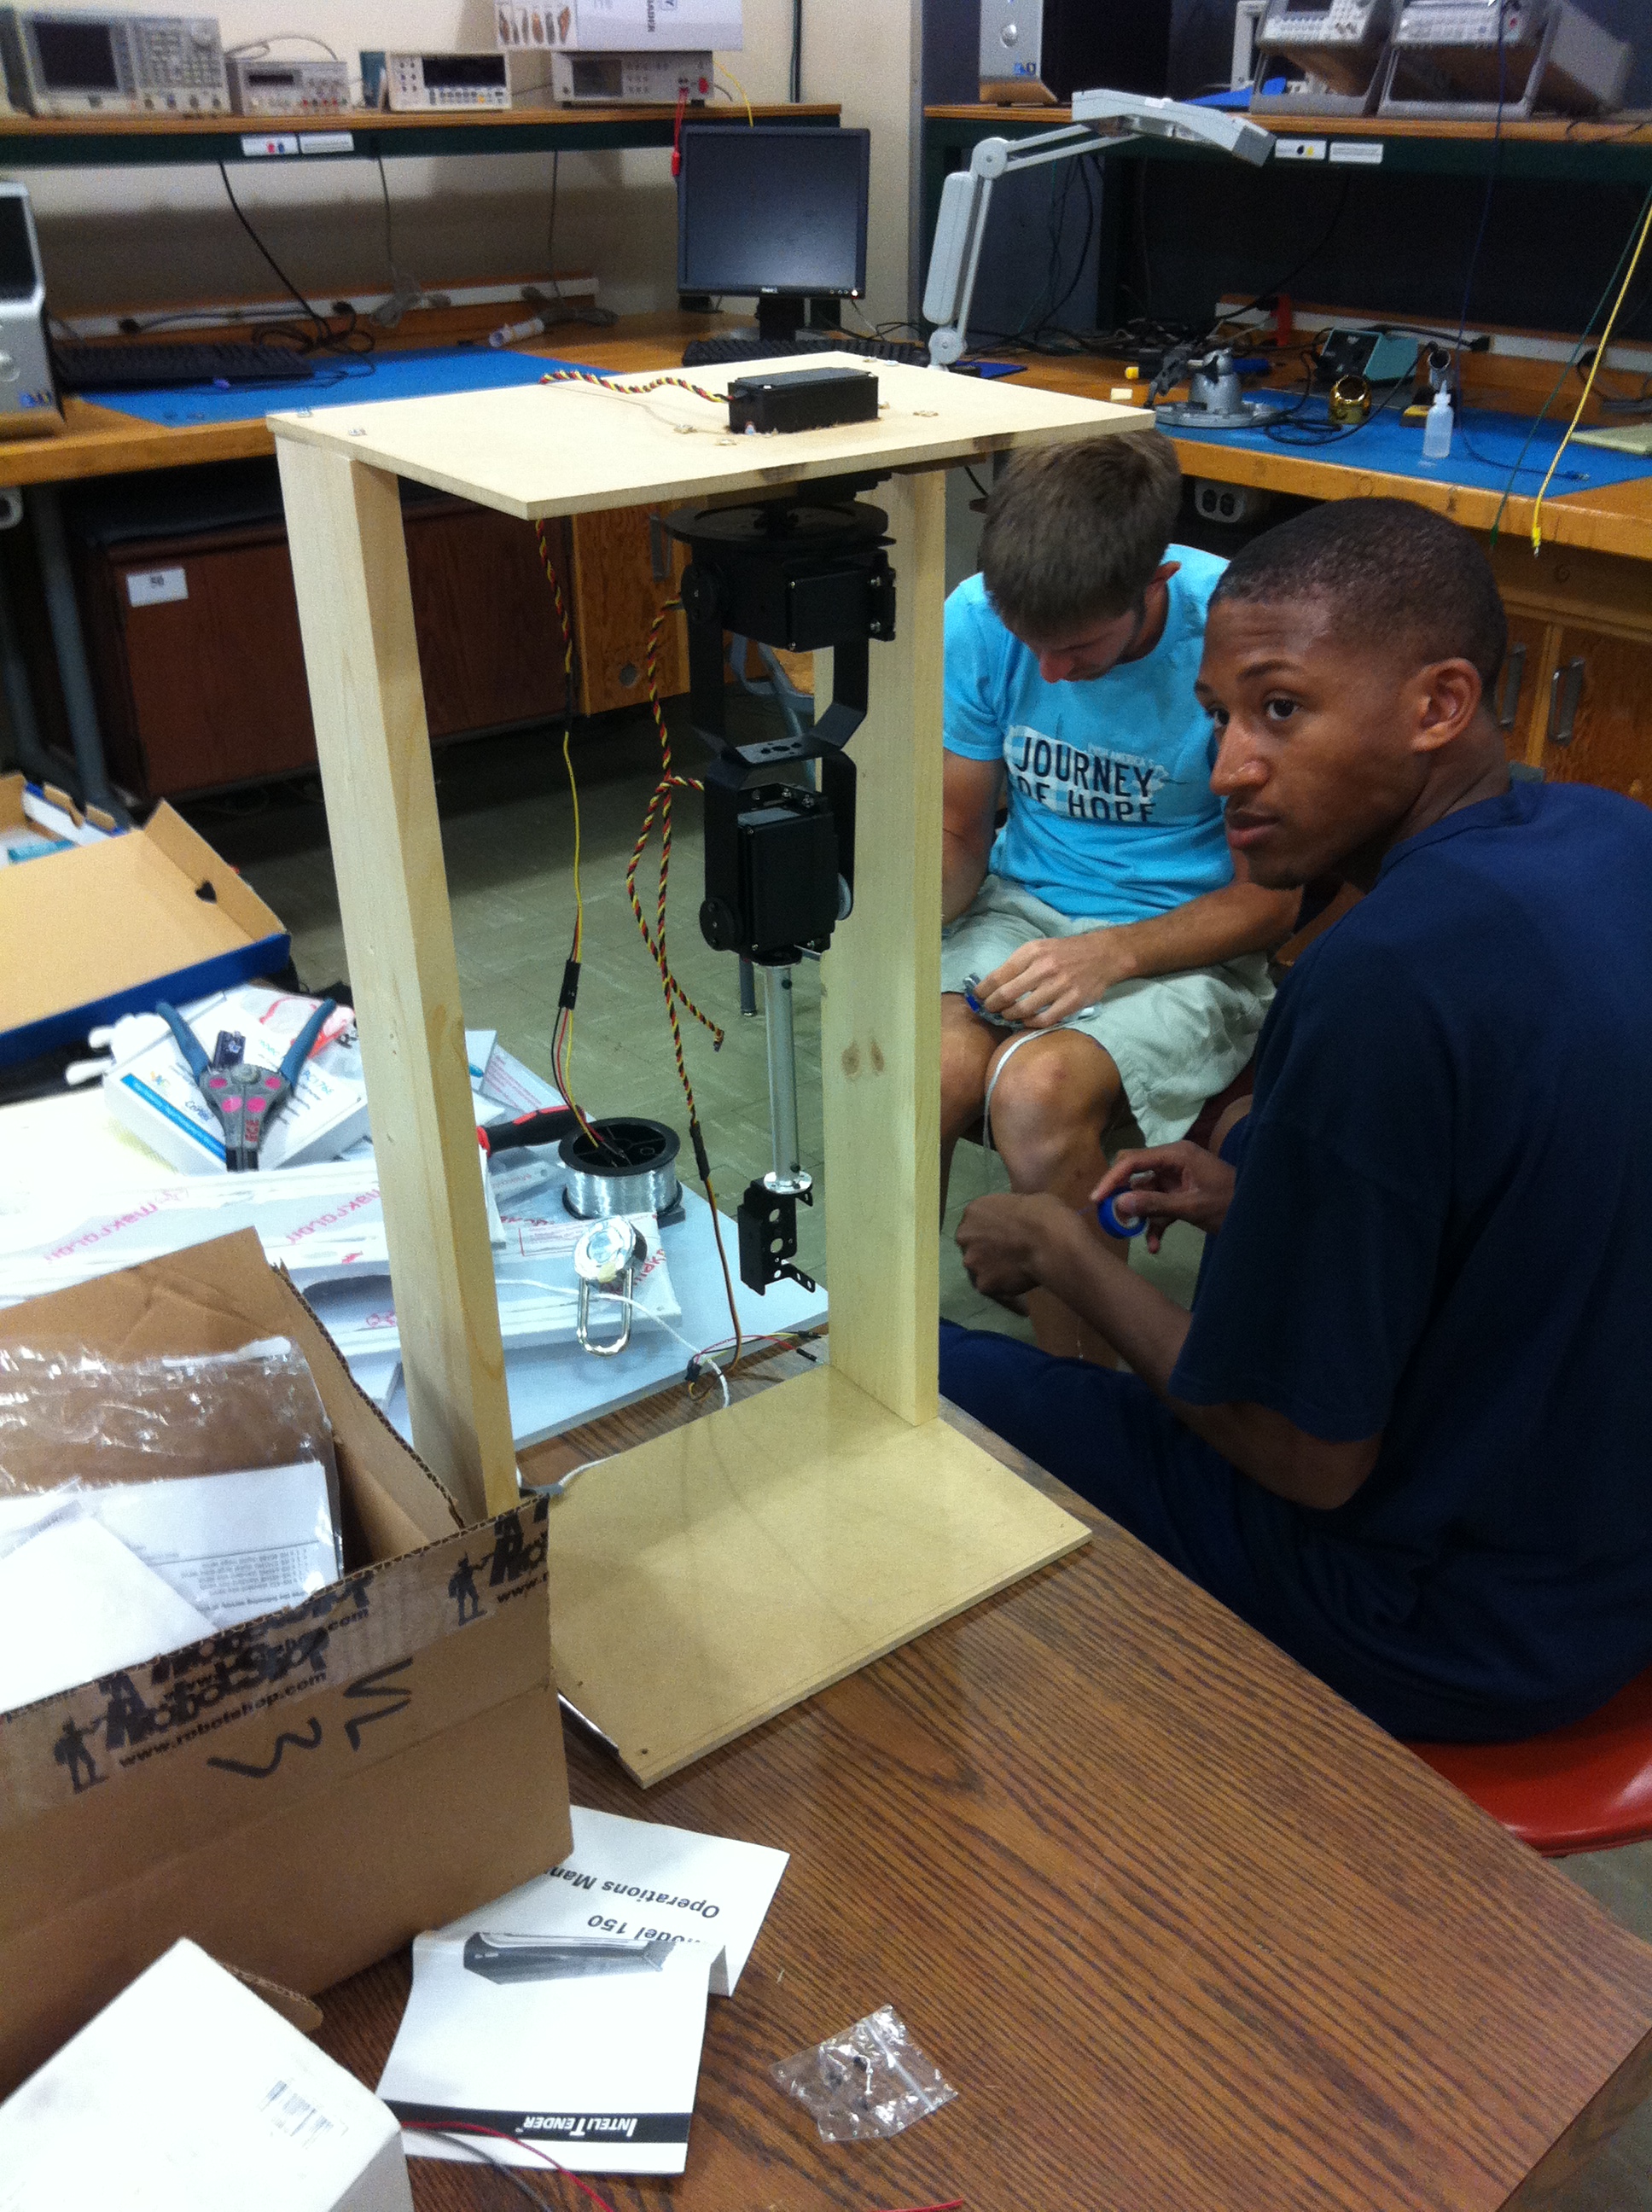
Building the arm
Having very little resources, and no knowledge about commercial robot platforms (which would most likely be out of budget anyway), we set out to create out our project out of something very minimalistic. What we found was the AL5D by Lynxmotion (http://www.lynxmotion.com/c-130-al5d.aspx).

That doesn’t look very human-like, so we constructed a chassis and slapped it upside down to the top, which looked like the right picture in the beginning stages. Let’s zoom in each joint.
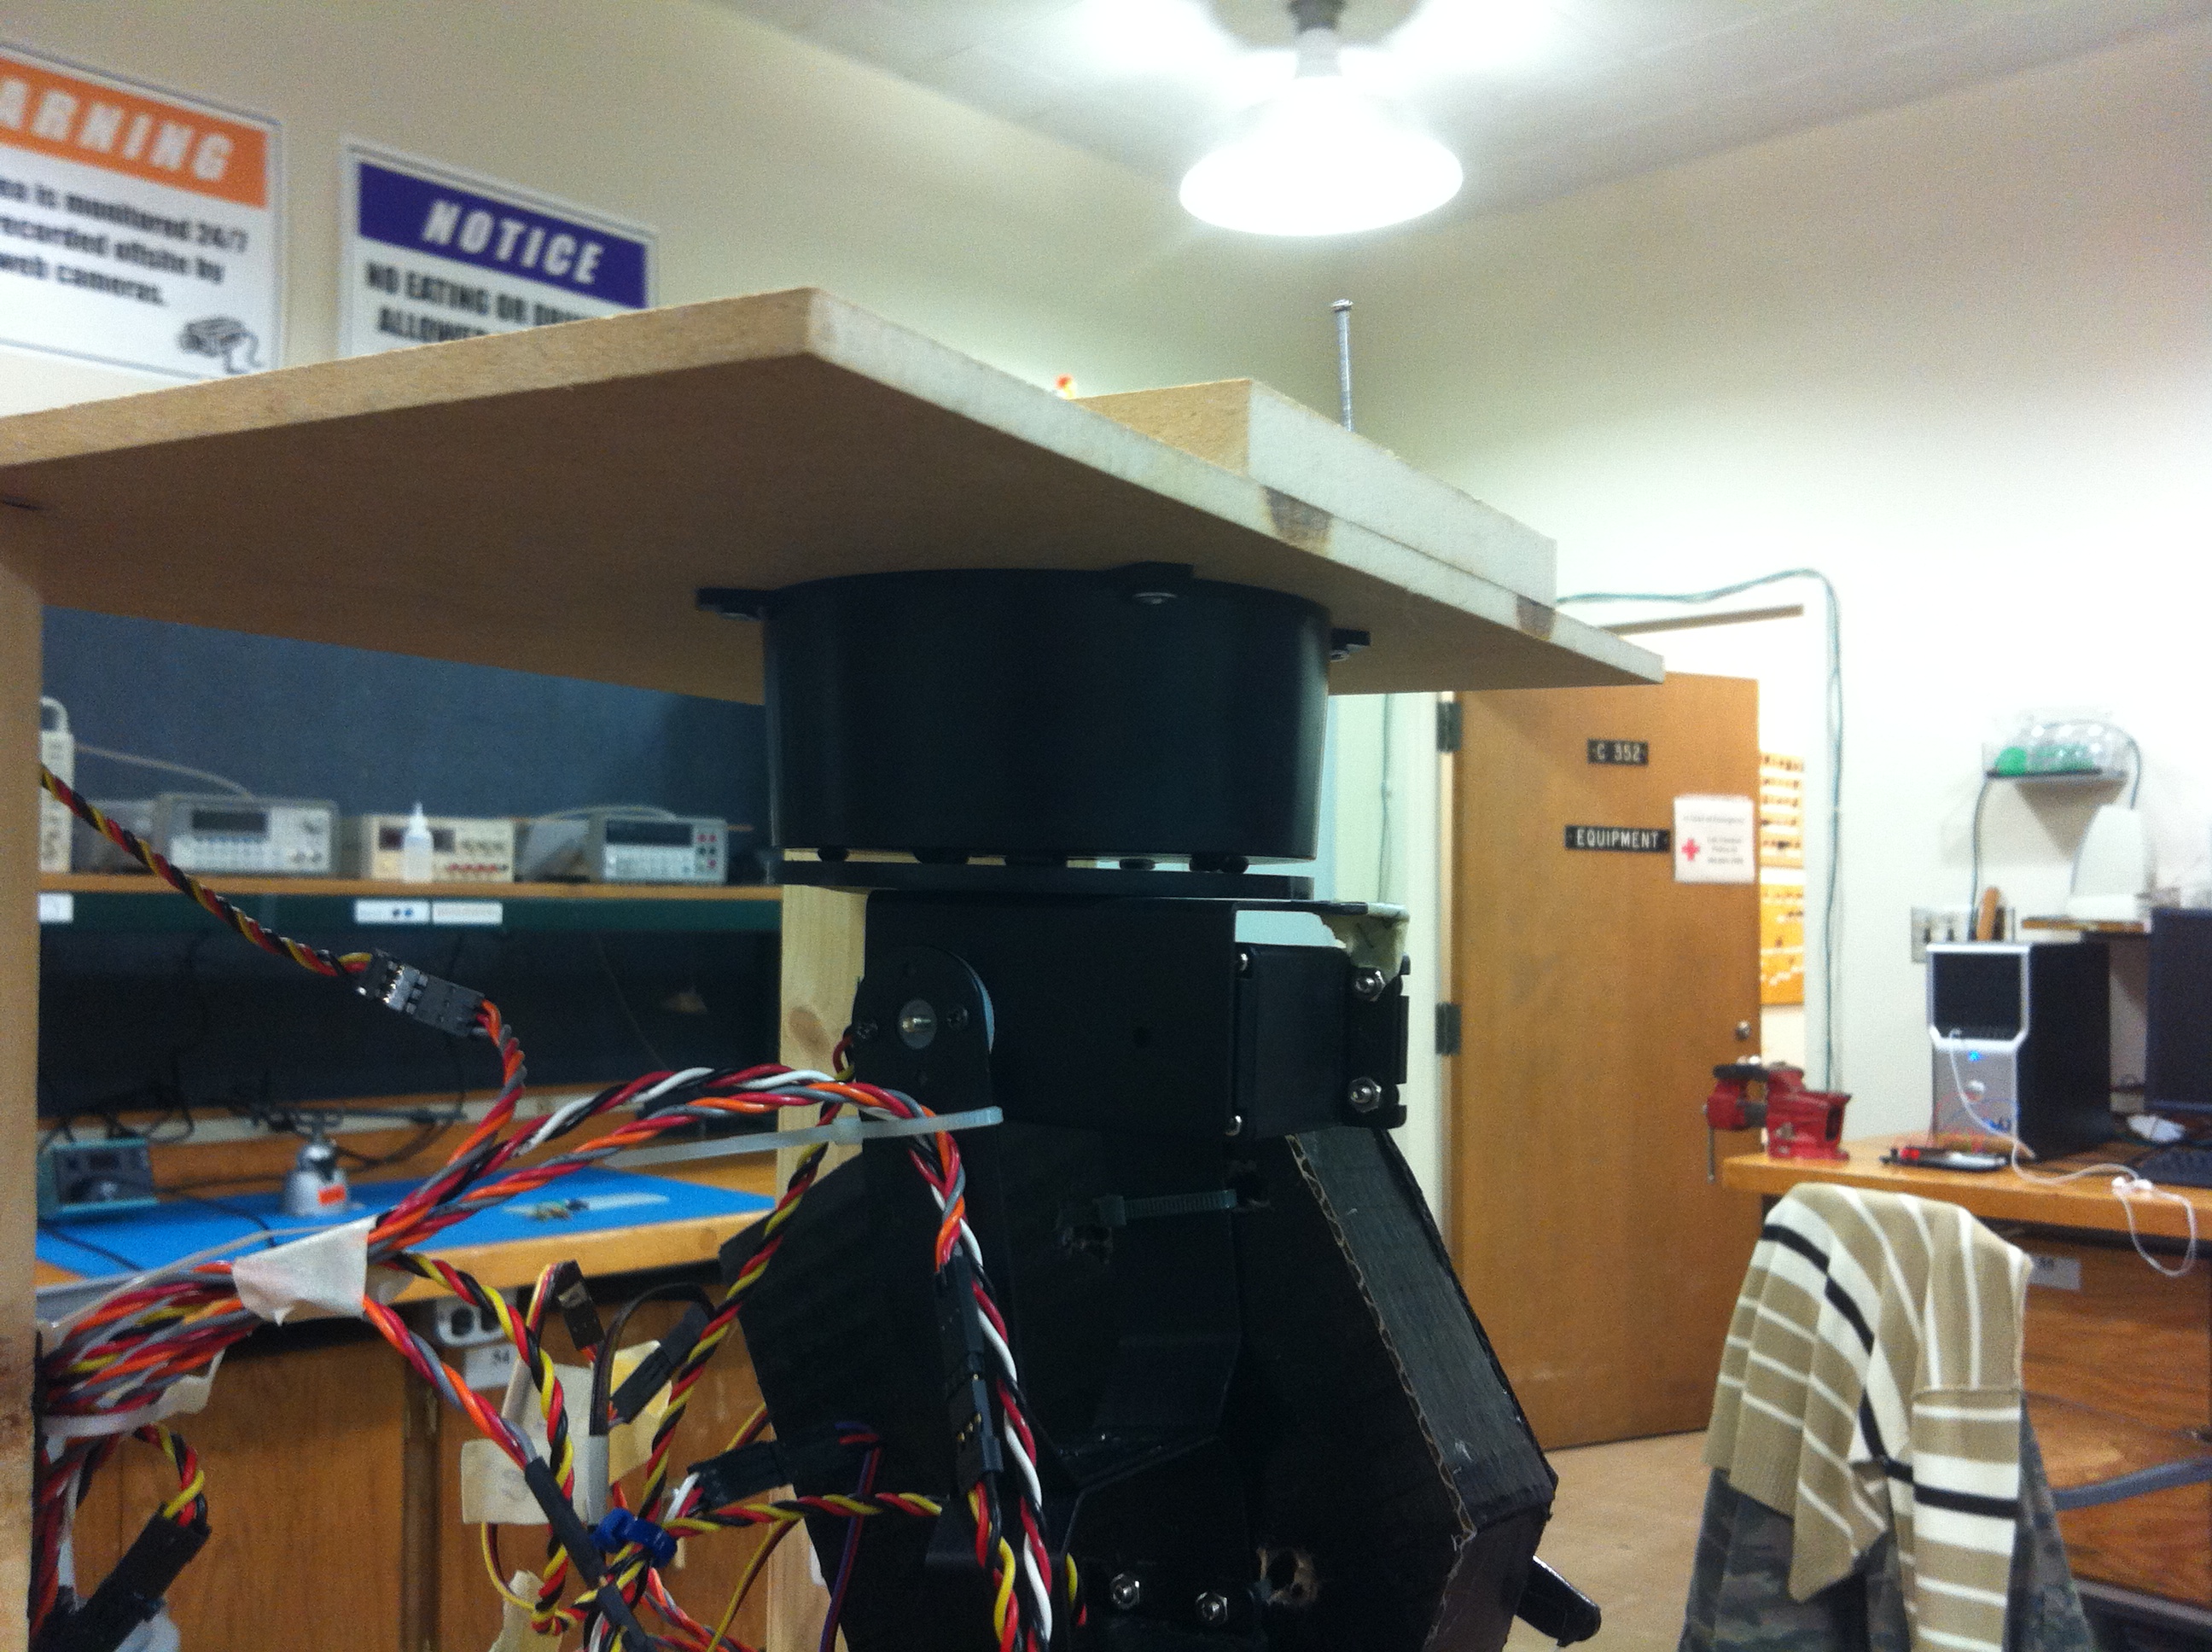
This is the shoulder. There two two degrees of freedoms afforded here. The first I will call the “base”, and it swivels about the vertical axis, controlled by one servo motor (hidden inside the case that’s connected to the top). The second I will call the “shoulder” (terrible naming, these two movable parts I also collectively call the shoulder), which rotates about an axis perpendicular to the vertical axis, and also controlled by another servo.
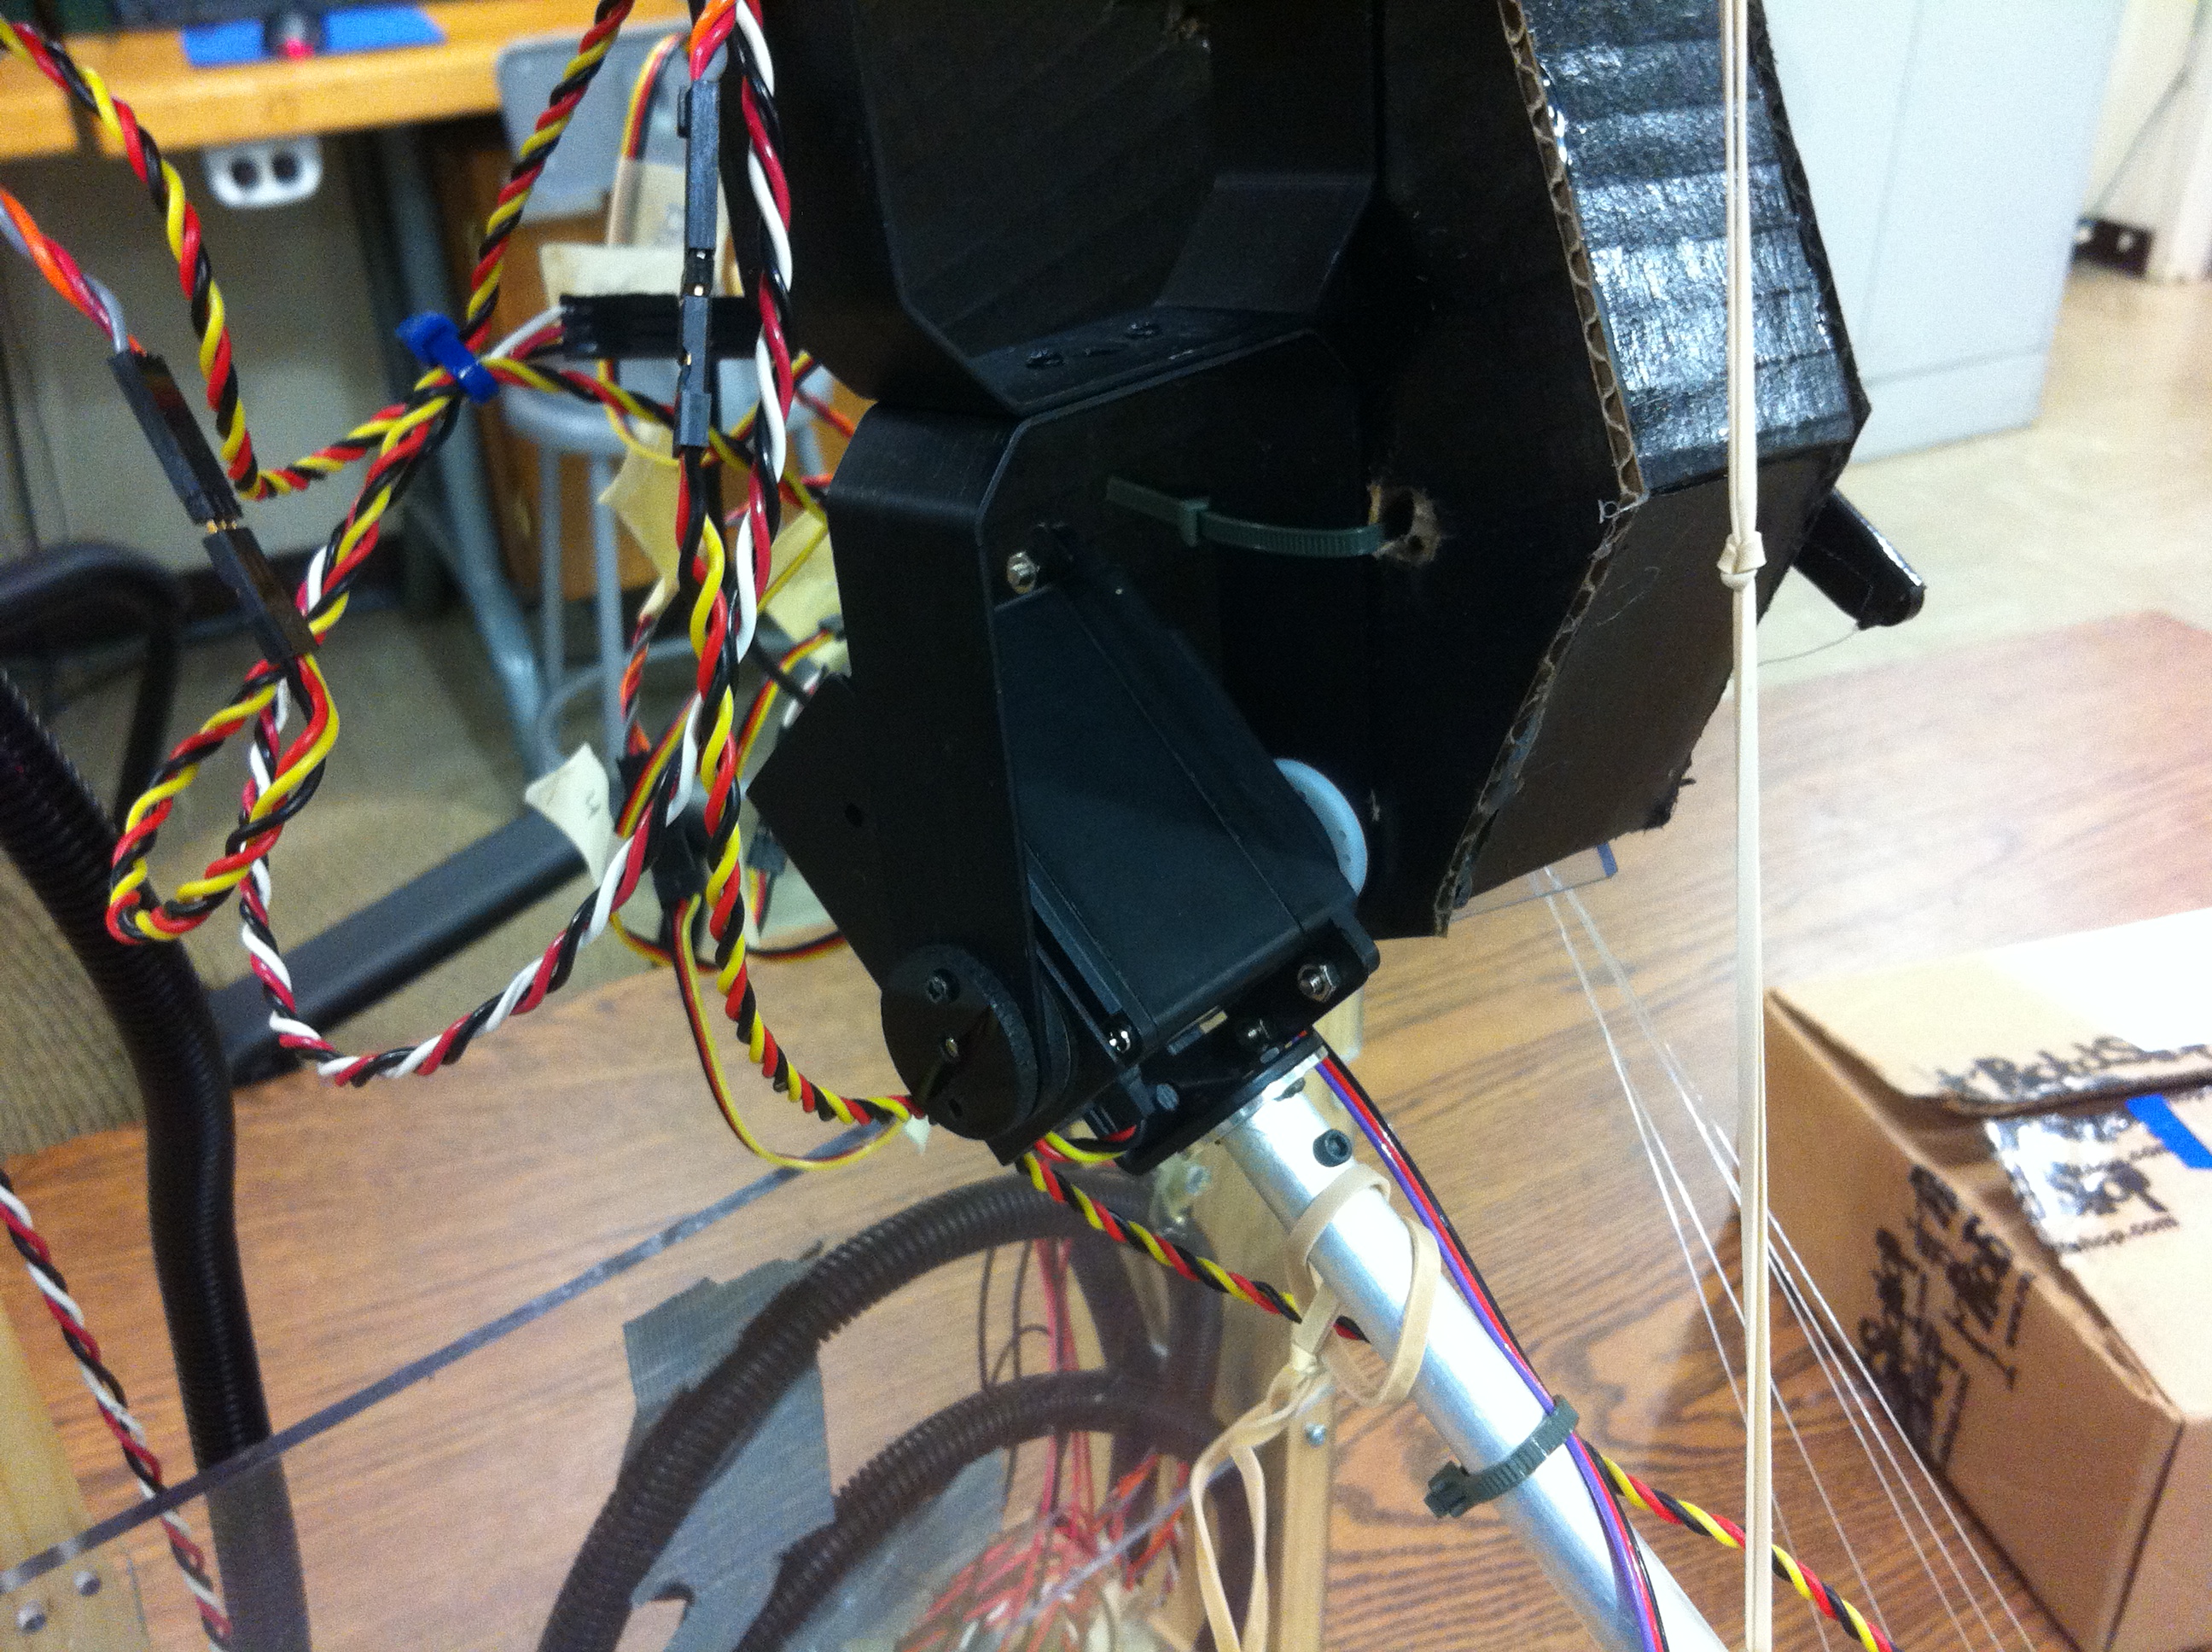
This is the elbow. It bends just like the human elbow does, and is controlled by another servo.

This is the wrist. It rotates about the axis made by your forearm (it moves like the Queen’s wave). And you guess it, it’s controlled by another servo. You might wonder if it can bend, and the answer’s unfortunately no. Tracking the wrist and hand proved to be difficult, so we did away with this movement possibility.
All together, the arm (minus the hand) provides 4DOF, so it’s not quite able to mimic a human arm fully.
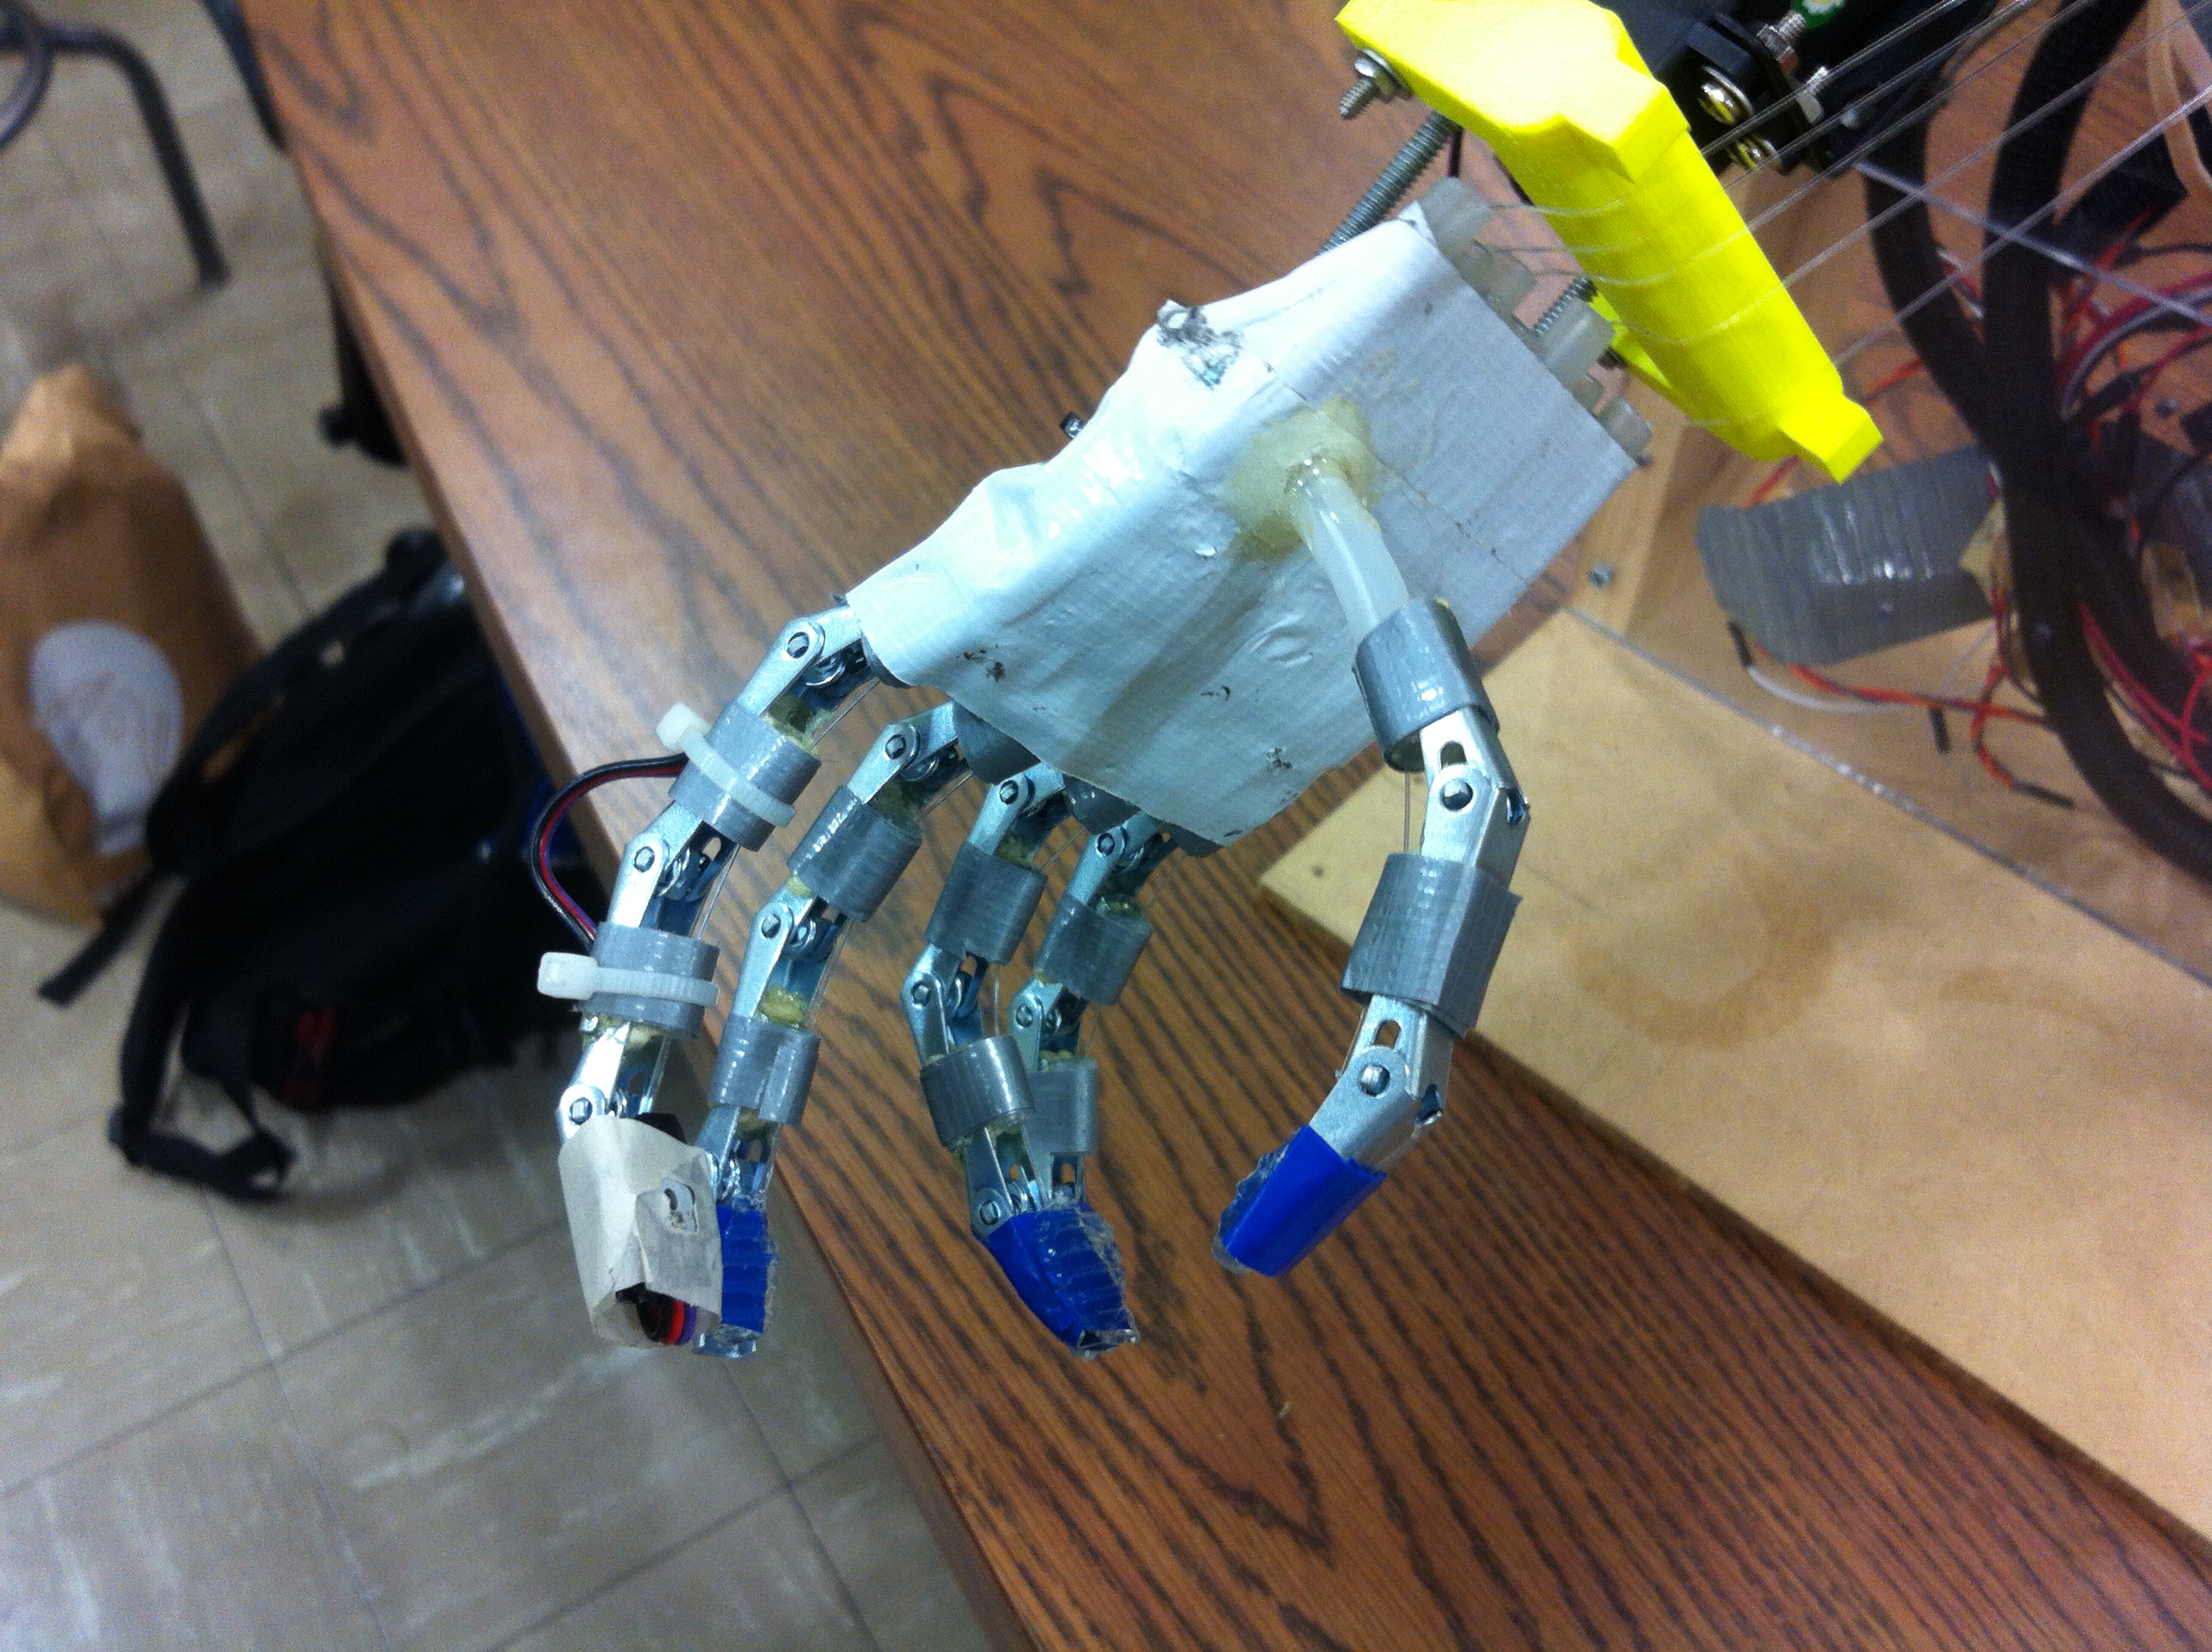
Building the hand
The hardware for the arm was about $150, but this nifty “hand” will run you just around $25 and your afternoon. This is actually a pretty popular design for the hobbyist’s animatronic hands. What you need is something with some natural tension/springiness. We found these things called toggle bolts. They’re made to affix things into walls. The flap is spring loaded, so that it can be closed and fed through holes and expand on the other side. We’re just interested in the flap part. If you overlay a few of these together, and introduce some tubing, you can make yourself a “finger”
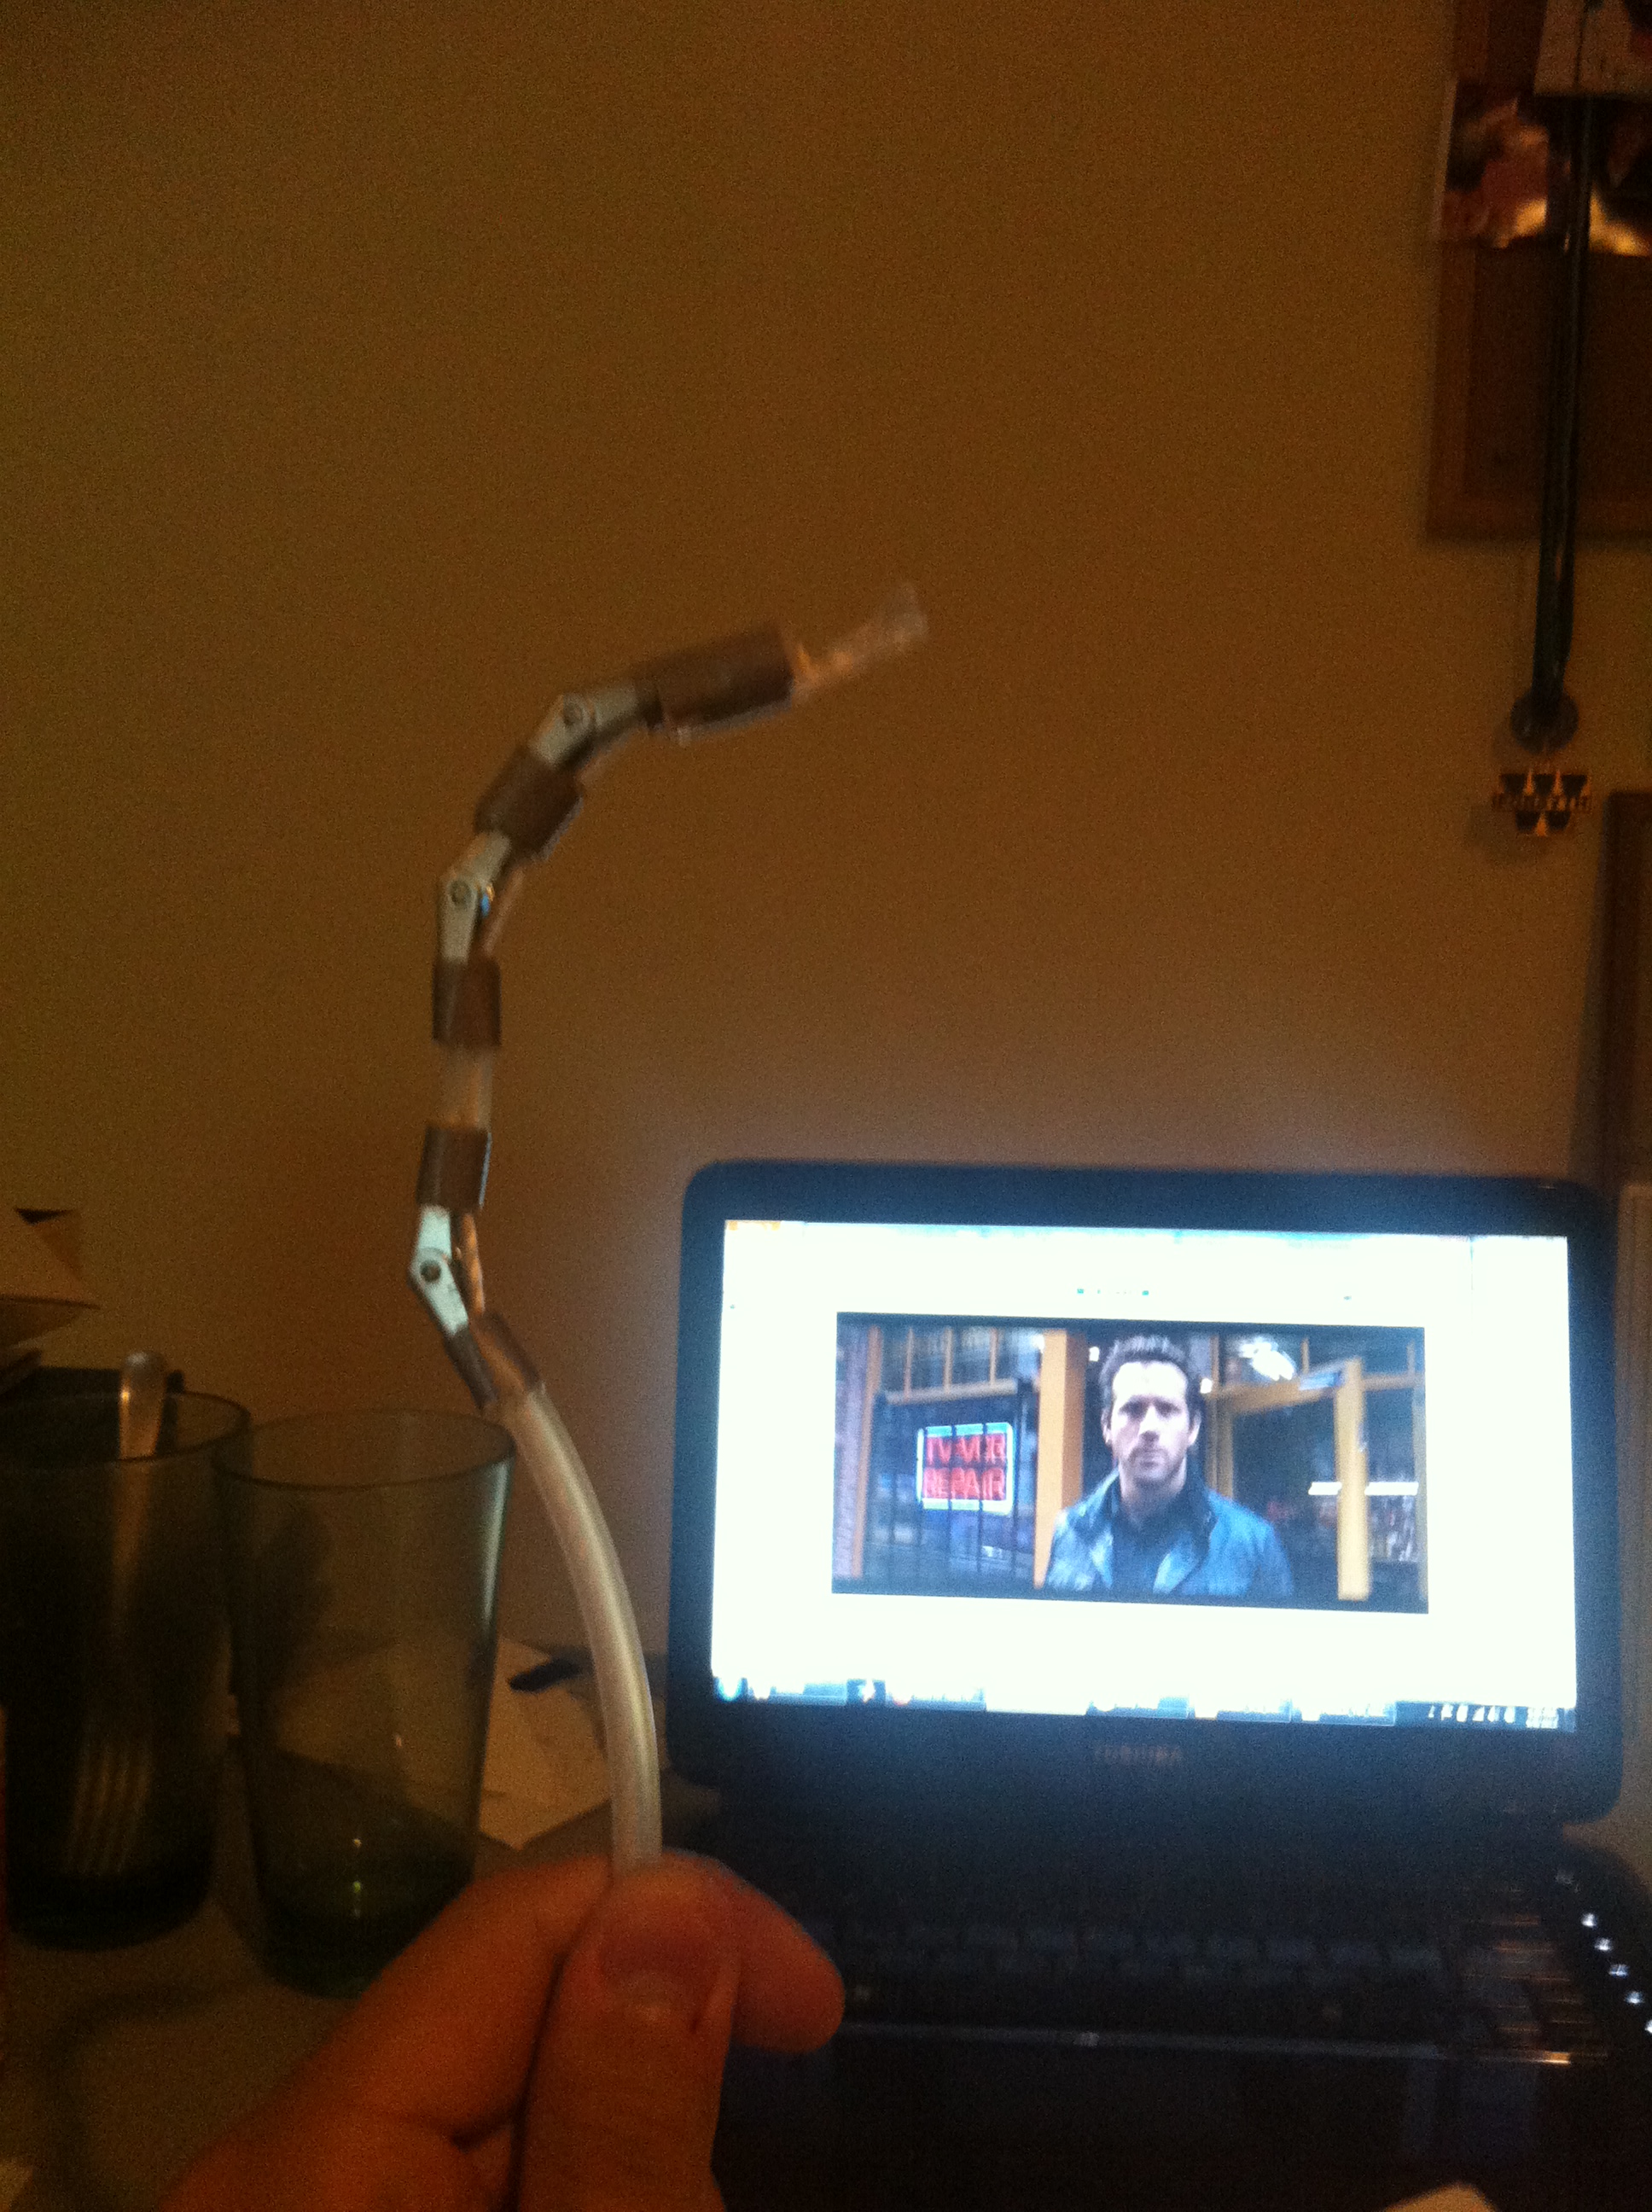 (for the record, RIPD was not a very good movie)
By tying a string to one end, and pulling on the other, it will bend in a way very similar to a real finger. Put a couple of these fingers together and you’ll almost have yourself a hand. Observe:
The thumb placement was tricky. We eventually settled on placing it directly opposite the rest of the fingers, even though a real thumb is not this restrictive. It still ended up working well enough.
 Building the glove
For reasons that will be explained later, we built a glove to control the hand portion of our arm.

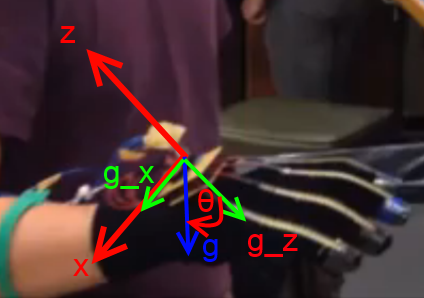
Just like the hand, this is also a fairly common maker’s project. The yellow stripes on the fingers are flex sensors, which are essentially potentiometers that react to bending. One way to use this is to make a voltage divider with these and feed the output to an ADC so as to monitor how you are bending your fingers. The red breakout board is an accelerometer. This is used to detect the tilt of the wrist. Depending on the orientation of your wrist, the force of gravity breaks down into vary components along the standard coordinate axis, like so
For now, this is all wired to the Arduino through a cable that connects to the perfboard circuit on the back of the hand.
Utilizing the Kinect
Even more so than the entire team’s lack of mechanical engineering and robotic knowledge, the whole project would have been a lot harder without the Kinect. I had played with the Kinect before so I knew that it was capable of skeletal tracking. By skeletal tracking, it means we are able to leverage the Kinect’s various sensors, and through programming with the SDK provided by Microsoft, to produce such a representation of the human body:

In addition to planar coordinates, the Kinect features a few depth sensors, so that it is actually able to provide coordinates of each joint IN SPACE. Moreover, all this requires is a few lines of code in the SDK. Then what we do is we extend vectors between say, the elbow and shoulder (call this A), the elbow and wrist (call this B), and use the relationship A dot B = |A||B|cos(theta) to get the angle between them. To get other angles, it remains to find the appropriate reference angles.
When it gets an angle, it then sends it over serial to an Arduino.
Arduino programming
Let’s consider Arduino one in the block diagram in the beginning. All this is responsible for is reading the various sensors on the glove and actuating the motors for the hand accordingly. For example, when I fully flex my index finger, there is a software mapping of this reading into the angle that the motor connected to the index finger is supposed to turn to. The accelerometer is an I2C device, and we similarly extract the acceleration magnitude in each coordinate axis, and use some trig to get the wrist tilt angle.
The second Arduino doesn’t have a terribly complex job either. Its job is the move the 4 motors controlling the arm. It is connected directly to the computer running the Kinect skeletal tracking program. It waits for the bytes that contain the angles for the arm, then moves the motors accordingly.
MISC.
Accessories: a lot of the immediate applications for this project involve sending it out into situations not suitable for humans, such as disaster relief and battlefields. We thought that it would be neat if this thing could take a pulse. Turns out, there is such a product for this (http://pulsesensor.myshopify.com/pages/code-and-guide). It’s a light sensor that with some programming, can be used to detect pulses. We strapped one of these onto the end of the index on the mechanical hand, and attempted to have a user direct the arm to a pulse location.
It…could use some work. But it opens up the possibility of incorporating sensors into the project so that it could interact with the environment more effectively.
Conclusion
Well that’s it. I hope you liked the project. I certainly enjoyed making it, and learned so much in the process. You can find the code posting here: https://github.com/pyeh9/Kinect-Controlled-Arm.
…oh and what’s this!?

For the uninformed, the Inventure Prize (http://www.gpb.org/inventure-2013) is a competition hosted at my school, Georgia Tech, in which groups enter projects and compete for prizes such as cash, and a patent drawn up free of charge. I had no originally planned to enter, but I was presented with this golden ticket that guarantees entry starting with the semifinals. How about that?
Thanks for reading!

Pingback: A Kinect Controlled Robotic Hand
Hei..good work. I am on a similar project, But i cant find your code on dropbox. Can you please send the entire project report to my email. I need to learn a lot from you. Thanks!
email: dkai04@gmail.com